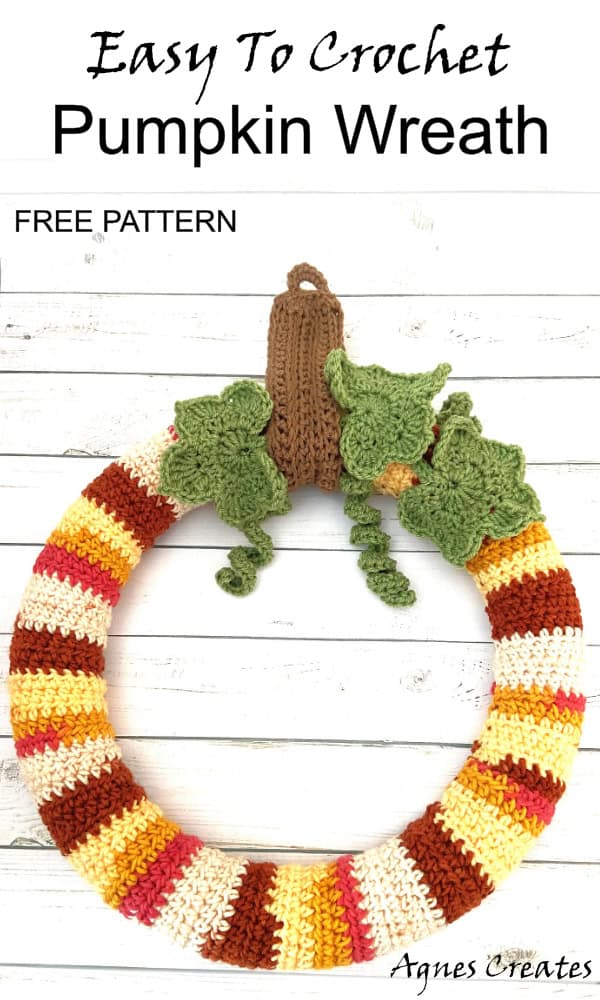
Follow this free pumpkin wreath crochet pattern for a perfect fall decor crochet pattern idea! Also, learn how to crochet any size styrofoam wreath cover using the half-double crochet stitch.
Previously, I had tried using the Red Heart Super Saver Yarn Aran- Warm Wheat All-in-One Granny Square to crochet a granny square, but with no luck. I used that yarn for a turkey wreath crochet pattern and a glass jar pumpkin cover crochet pattern. Since I still had some of that yarn left over, I used it for a pumpkin wreath crochet pattern. Also, I used the Red Heart Super Saver yarn in a tea leaf and a cafe latte color. This post contains some affiliate links for your convenience (which means if you make a purchase after clicking a link, I will earn a small commission, but it won’t cost you a penny more)!
What you need for a pumpkin wreath crochet pattern
-
styrofoam wreath – I used a 15.9-inch wreath
-
4 medium worsted yarn in desired colors – I like working with Red Heart Super Saver yarn
-
crochet hook size I 5.5 mm – I love the Clover brand crochet hooks
-
stitch markers
-
scissors
-
hot glue gun
-
yarn hand needle
ABBREVIATIONS:
ch – chain
slst – slip stitch
sc – single crochet
hdc – half double crochet
dc – double crochet
tr – treble
sc2tog – crochet two single crochet together – decrease
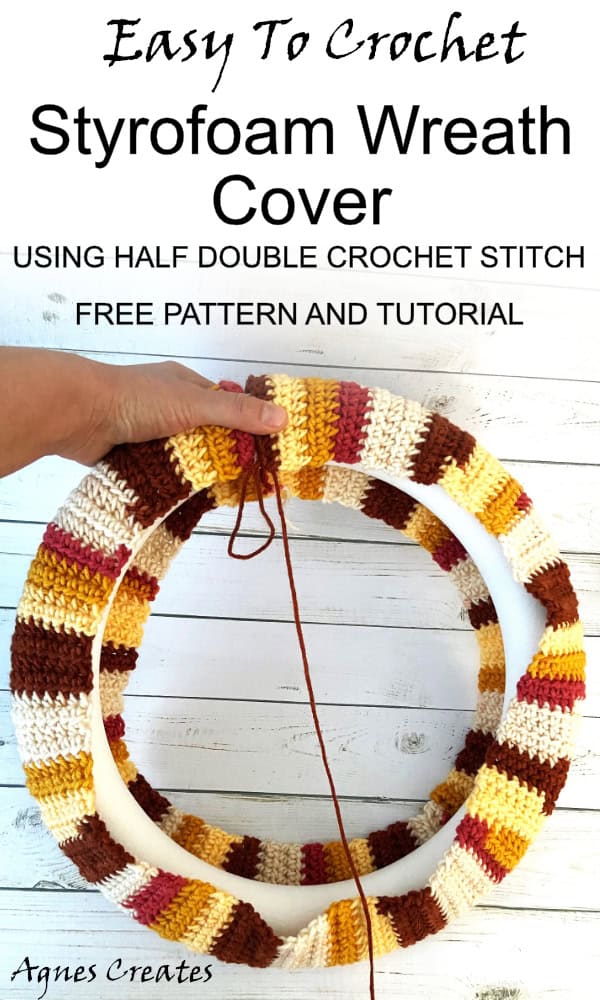
First, follow the styrofoam wreath cover crochet pattern and tutorial using a half double crochet stitch. You can crochet a cover for any size of the styrofoam wreath form. I used a 16-inch wreath form.
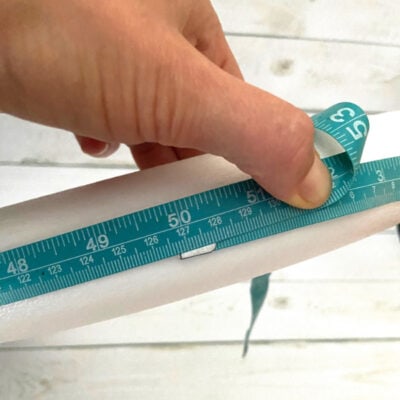
Step 1. Measure the thickness of the styrofoam wreath. My measure is 6 inches thick.
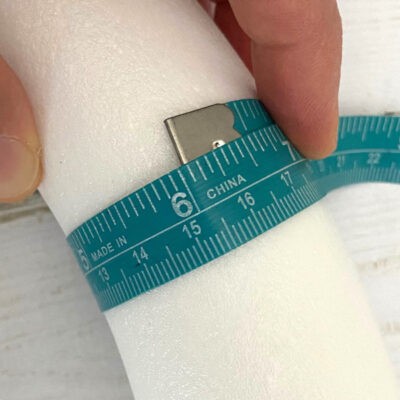
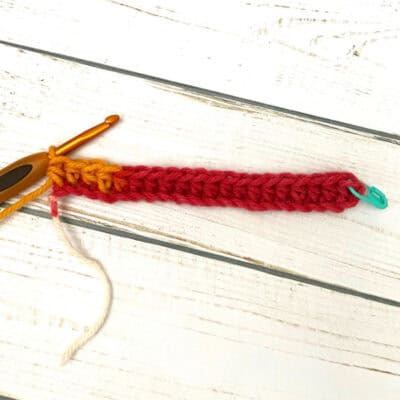
Step 2. Make a chain 6 inches long
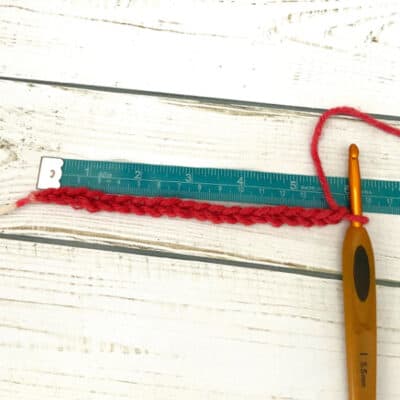
1. I chained 20
2. ch1 (does not count as a stitch) 1hdc in the second ch from the hook, 1hdc in each next ch to end, turn (20 sts)
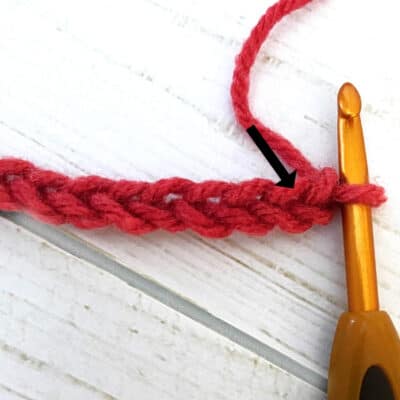
3. Ch1, 1hdc in the second ch from the hook, 1hdc in each next ch to end, turn (20)
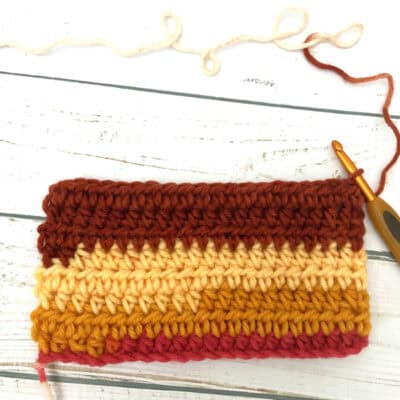
4: Repeat round 3 about 120 times, and that will make the cover long enough to go around the wreath. You can measure the styrofoam wreath form around and then make the cover that long. Or, just wrap the crochet cover around the form and see if it’s long enough.
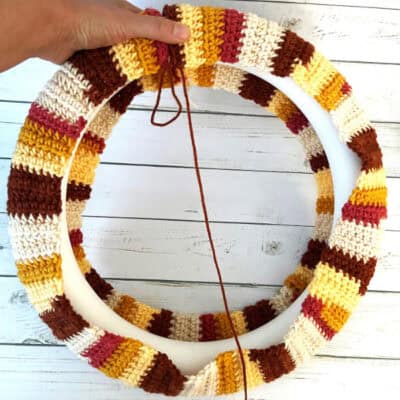
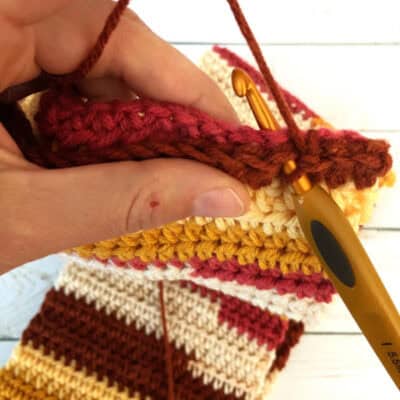
Step 3. slst the cover’s short ends together and leave the tail of yarn long enough for stitching the cover around the wreath.
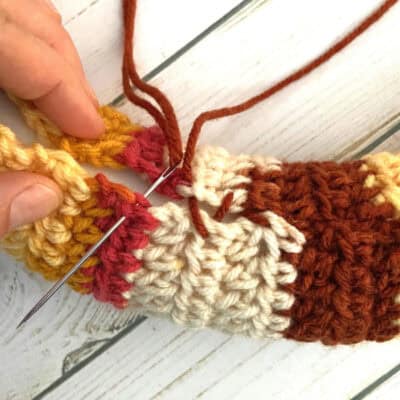
Step 4. Thread the yarn needle on the long piece of yarn and arrange the crocheted cover around the wreath. Make sure that the crochet rows align, then stitch the cover using mattress stitch.
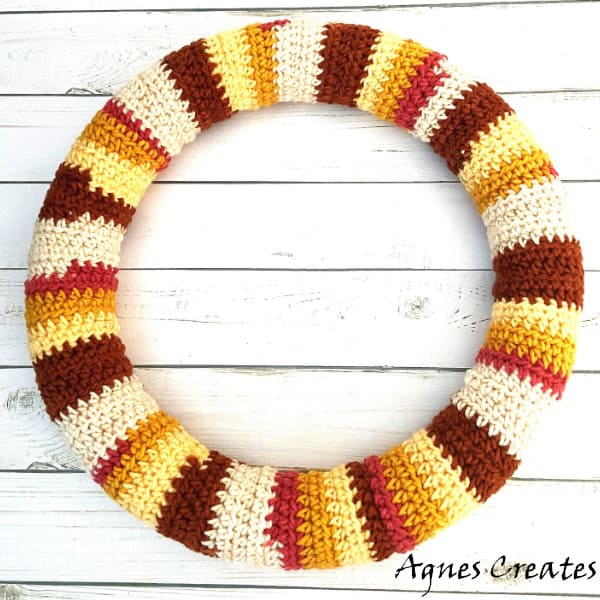
Now, you have a crochet wreath base all ready to decorate.
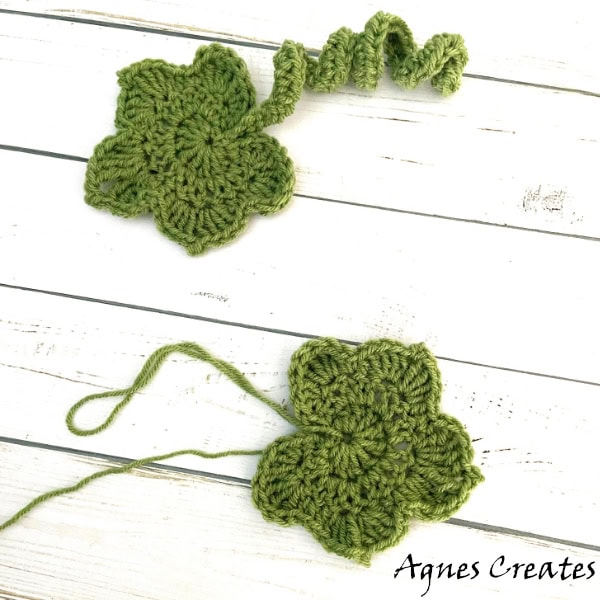
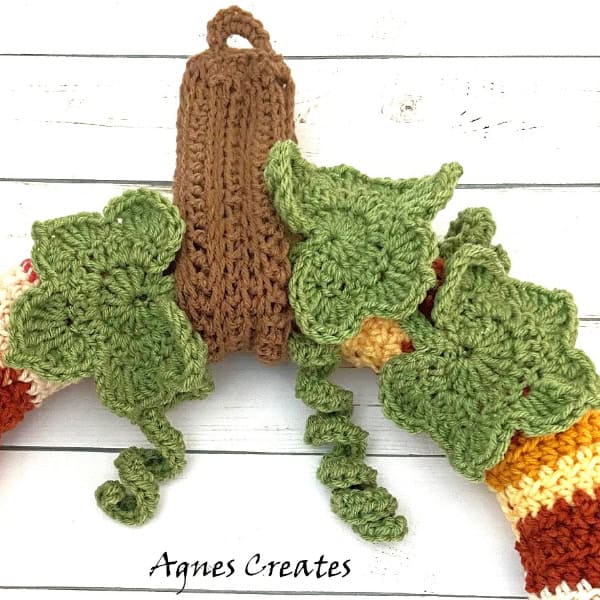
Let’s follow the pumpkin leaf crochet pattern. The leaf measures approximately 4.5 inches wide and 4 inches long.
1. ch4, slst into the first ch to make a ring.
2. work sc, 9dc, sc into the ring, turn
3. sc in same st, 2dc in next 9sts, sc in last st, turn
4. sc in same st, hdc and 3dc in next st, 4tr in next st, hdc and sc in next st, hdc in next st, 4dc in next st, ch2, slst in second ch from hook (picot)
4dc in next st, hdc in next st, sc and hdc in next st, 4tr in next st, ch2, slst in second ch from hook (picot)
Now, repeat round 4 in reverse:
4tr in next st, hdc and sc in next st, hdc in next st, 4dc in next st, ch2, slst in second ch from hook (picot),
4dc in next st, hdc in next st, sc and hdc in next st, 4tr in next st, 3dc and hdc in next st, sc in last st,
sl st to the ring, and now crochet the pumpkin vine. You can make the vine as long as you want. I chained 40, hdc in the second ch from the hook, hdc in the same ch, 2hdc in every next ch, slst in the last 8 ch, slst to the ring. Cut the yarn, leaving a yarn tail. Slip the yarn tail to the back of the leaf and make a knot with the yarn tails. Cut off the access yarn.
If you’d like the vine less spirally, crochet 2hdc in one ch and hdc in the next ch. Repeat until the last 8 ch and then slst the last 8ch.
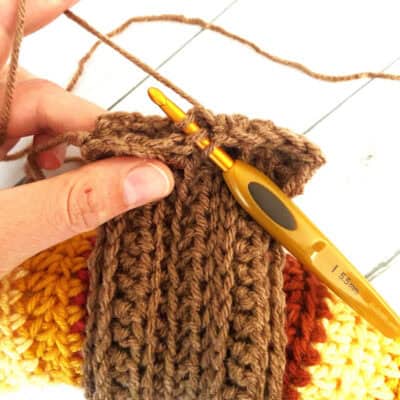
Finally, let’s crochet a stem for the pumpkin wreath. It will also work as a hanger for the wreath.
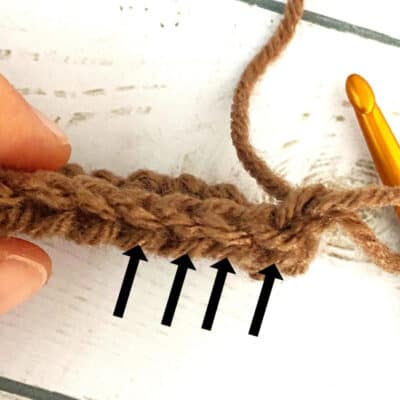
1. Using the brown yarn ch 43, hdc in the second ch from the hook, hdc in next chs, turn
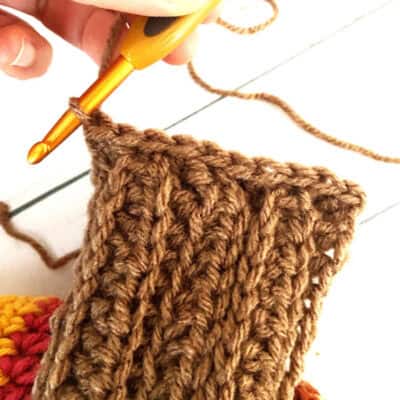
2. ch1, hdc in the back loops of every st, turn
3. ch1, hdc in the front loops of every st, turn
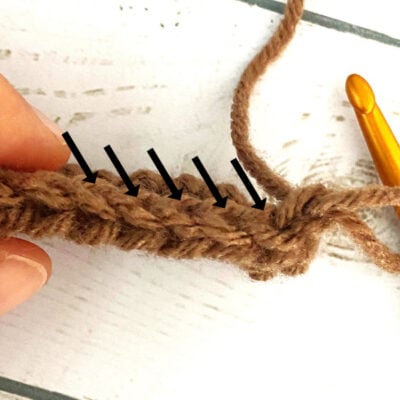
4. repeat rounds 2 and 3 two more times
5. put the stem piece around the pumpkin, aligning the short end and evenly slst the edges together, turn
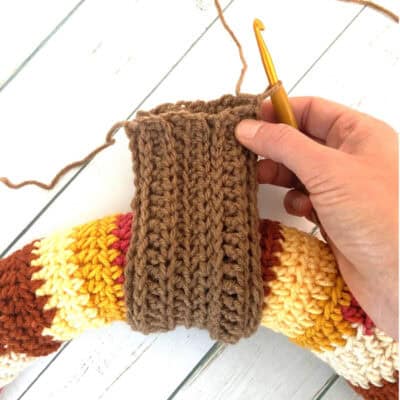
After slst the short ends of the stem together, I got 10 sts, turn
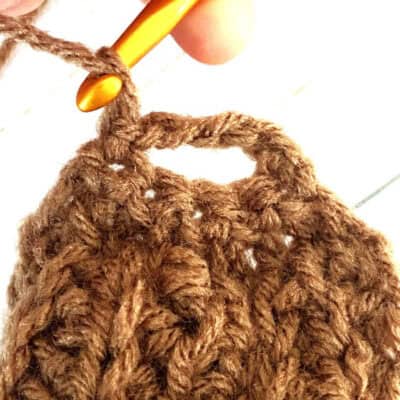
6. ch1, sc 2 together x5, turn
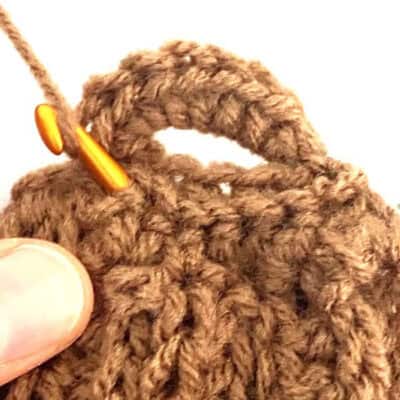
7. ch 6 and slst to last st, turn
8. 8 sc into the ch6 space, Cut the yarn and slip the inside of the stem, and make a knot with the yarn tails to secure.
Arrange the leaves with vines inside the stem or on the side of the pumpkin. Use a hot glue gun to secure the leaves to the pumpkin.
I hope that you found my pumpkin wreath crochet pattern useful and easy to follow. Please come back soon to my blog to check on other crochet projects that I post often. Also, you are welcome to share a picture of your pumpkin wreath on my Facebook page.
Happy Crocheting!
Love,
Agnes
Want To Remember This? Save The Pumpkin Wreath Crochet Pattern To Your Favorite Pinterest Board?