
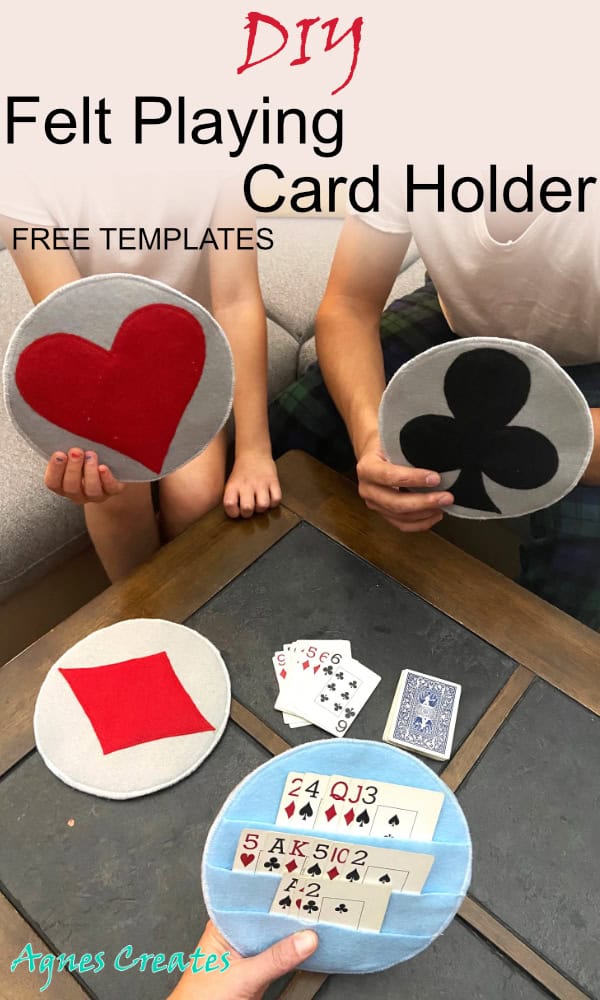
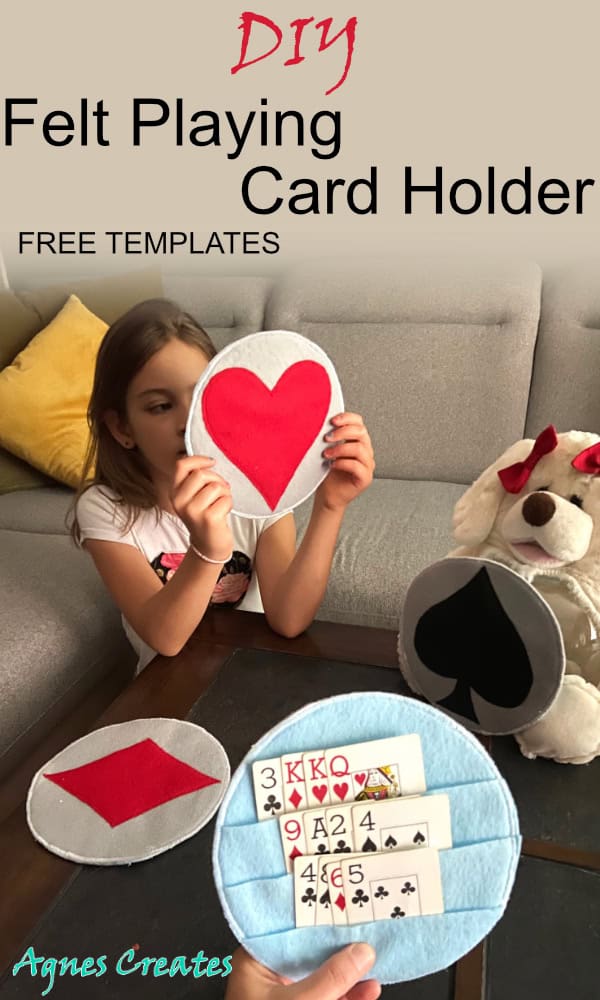
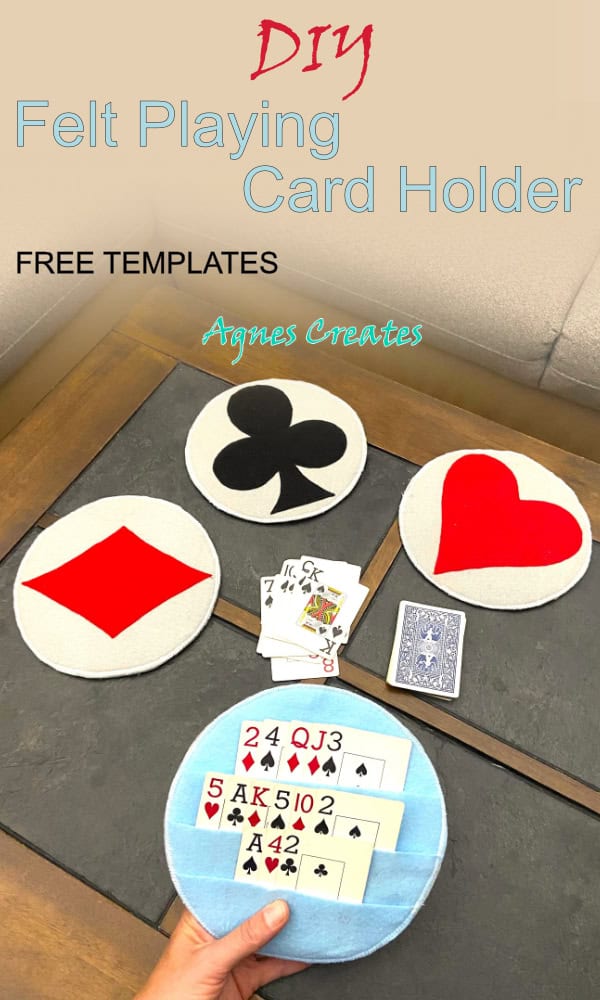
DIY playing card holder is an easy felt sewing project! Surprise your family on a game night with handmade playing card holders!
I designed the DIY playing card holder because my daughter had difficulty holding a handful of cards in her little hands. Our favorite game is Crazy Eights, and sometimes you can end up with a lot of cards. We all love our playing card holders because they make playing games easy and fun. And it’s easy to see all the cards.
Let’s get ready to make a DIY playing card holder!
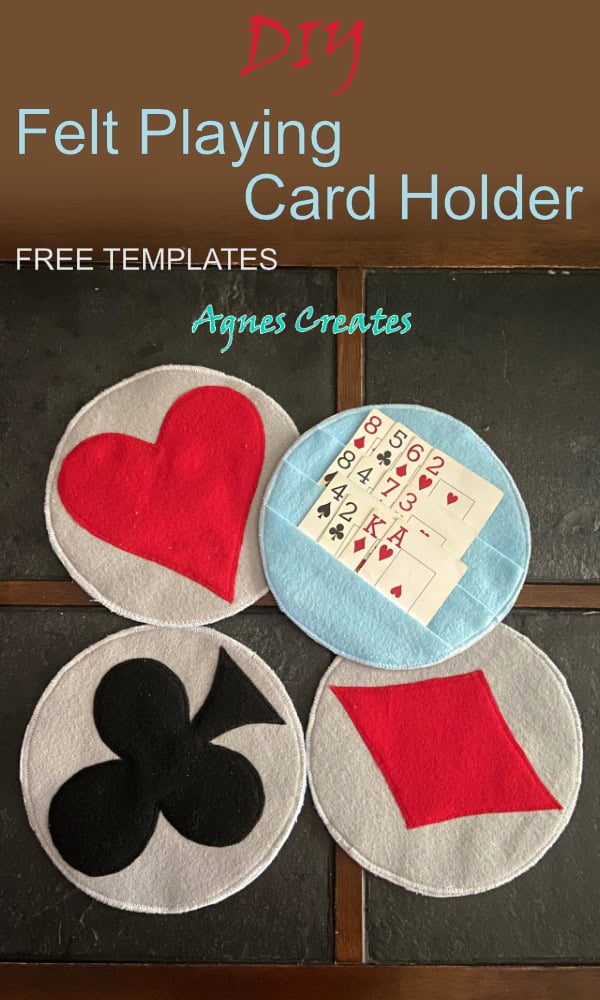
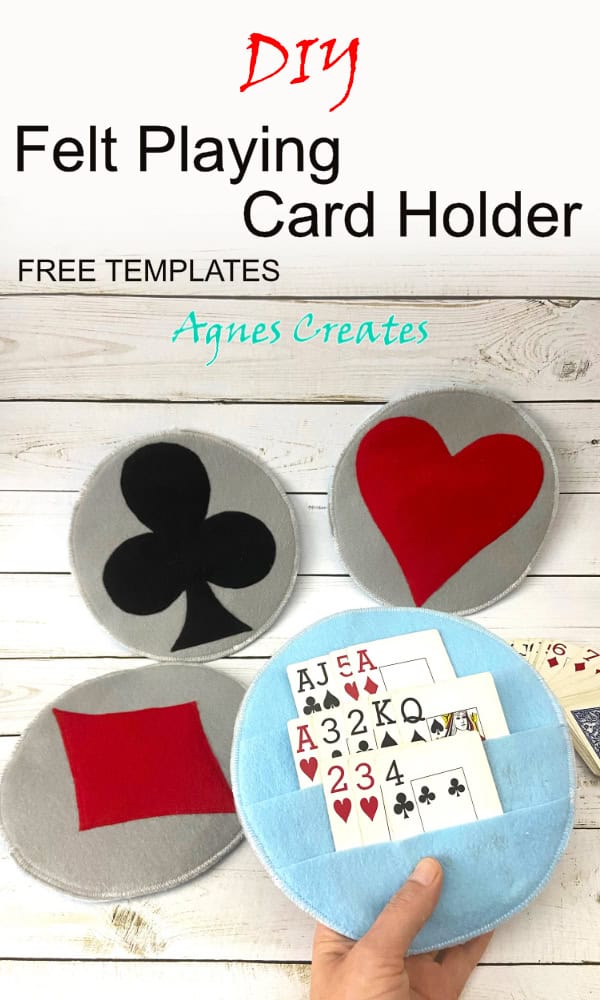
To make one playing card holder, you’ll need two 9 x 12-inch sheets of felt of any color you desire. As you can see in the picture, I used light gray for the outside and light blue for the inside. I used pieces of leftover light blue felt to make the two pockets. To have enough leftover felt for pockets, you need to cut the circle close to the felt sheet edges. Also, you’ll need red and black felt for the symbols. You can also use the 9 x 12-inch felt sheets, but one for each symbol.
You may also use felt that you can buy by the yard. This post contains some affiliate links for your convenience (which means if you make a purchase after clicking a link, I will earn a small commission, but it won’t cost you a penny more)! I always recommend products I have tried, use, and love.
I highly recommend using a Cricut machine to cut out all the pieces, especially if you are making several holders. It will save you a lot of time, and the pieces will be perfectly cut. The free SVG file for the playing card holders is in my resource library.
You may also like my other felt projects:
-
DIY daisy placemats and coasters,
-
DIY Valentine’s Day wreath and
-
easy to make a felt candle ornament.
A Cricut machine would be very useful in making all the mentioned projects.
What you need for a DIY playing card holder
-
basic sewing tools
-
sheets of felt in desired colors (9×12″)
-
fusible midweight interfacing
-
sharp, detailed scissors or a Cricut machine
-
free playing card symbols template (PDF and SVG) is ready to download at my resource library. to get the password, fill out the form at the bottom of this post.
YOU CAN GET THE AD-FREE PDF PRINTABLE PATTERN OF THE FELT PLAYING CARD HOLDER AT MY SHOP! IT INCLUDES:
-
PLAYING CARD SYMBOLS TEMPLATE,
-
TEMPLATE OF THE CIRCLE USED IN MAKING THE HOLDERS,
-
DETAILED STEP-BY-STEP SEWING TUTORIAL WITH PICTURES
I’m happy to teach you how to sew a felt playing card holder!
Step 1. If you are making four holders, you need to cut eight circles out of the felt. Next, iron-on interfacing to one side of each felt circle.
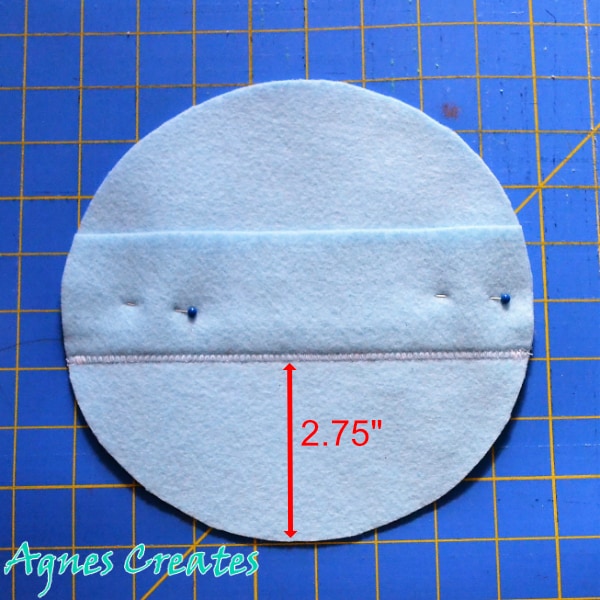
Step 2. Cut 2” wide strips out of felt and pin one strip about 2.75” from the bottom on for circles. Trim the short edges of the strip to shape the circle. Now, using a zig-zag stitch, stitch the bottom edge of the strips to the circles.
Repeat this the same with the second strip, but place it about 1.5” from the bottom. Keep the stitched-on strips pinned to the circles so that the upper part of each strip stays in place.
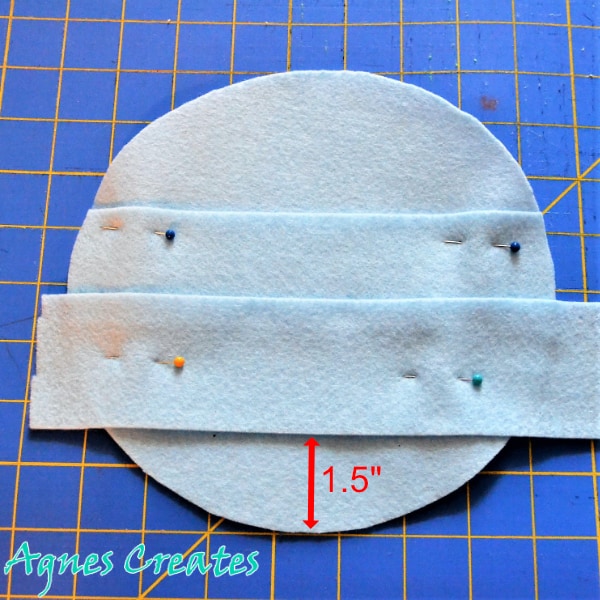
Next, pin a third strip to the circle. The bottom edge of the strip should align with the bottom of the circle. Trim the short edges of the strip to shape the circle. Starting with the upper right side of the first strip, stitch the short edges of the strips to the circle.
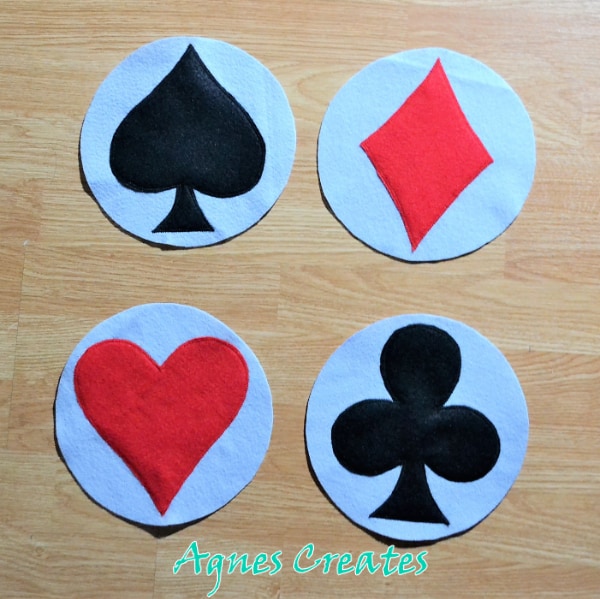
Step 3. Now, cut the symbols out of the red and black felt. Next, using a zig-zag stitch and matching thread, appliqué them to the other four circles.
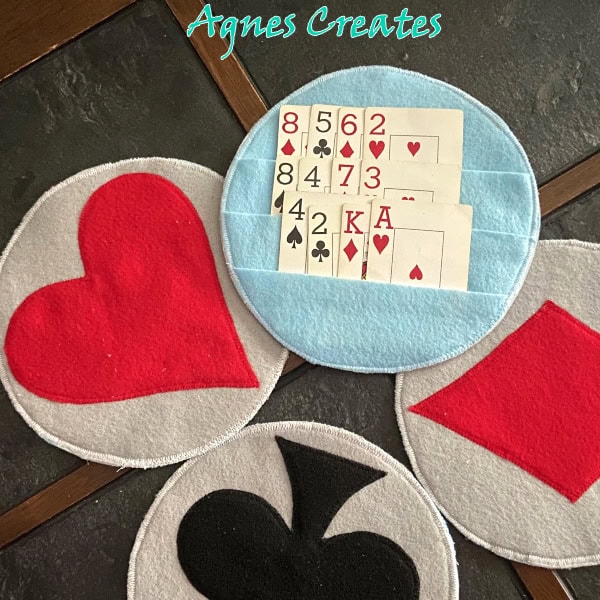
Step 4. Finally, pin circles with pockets to circles with symbols. Interfaced sides together. Make sure that the symbols are in an upright position to the pockets. Then, using a zig-zag stitch, stitch them around.
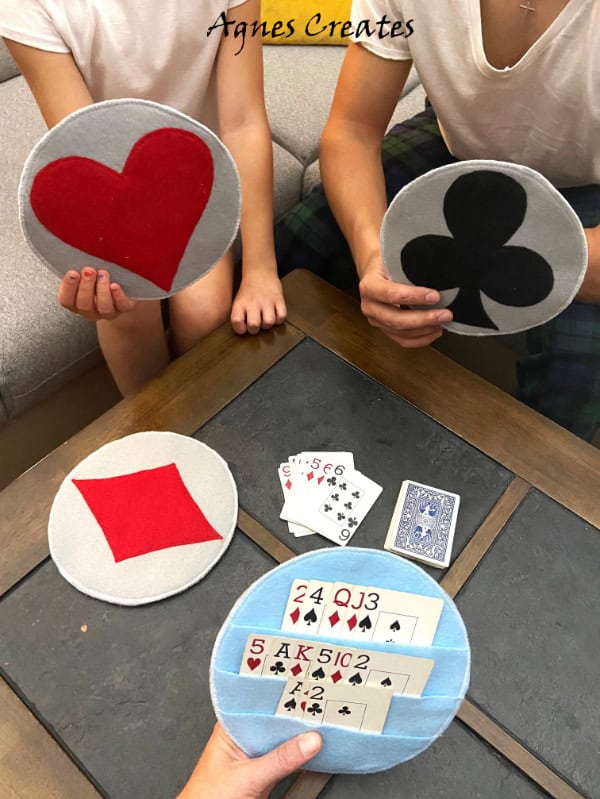
And, there! Now, you can surprise your family with these fun card holders at the next game time. They also make a perfect handmade gift idea.
I hope you enjoyed this felt project idea. You are welcome to share a picture of your playing card holders on my Facebook page.
Happy Gaming!
Love,
Agnes
Want To Remember This? Save The DIY Playing Card Holder Felt Project To Your Favorite Pinterest Board!
How big are the felt circles?
Hello Catty, it’s 8 inches in diameter.
Oh my goodness! What a cool idea. I stumbled onto your DIY card holder totally by accident. But I am seriously going to make a few for my friends at the assisted living facility. They struggle to hold all those card in their hands at one time. Thank you for sharing such a great idea. Richmond, VA