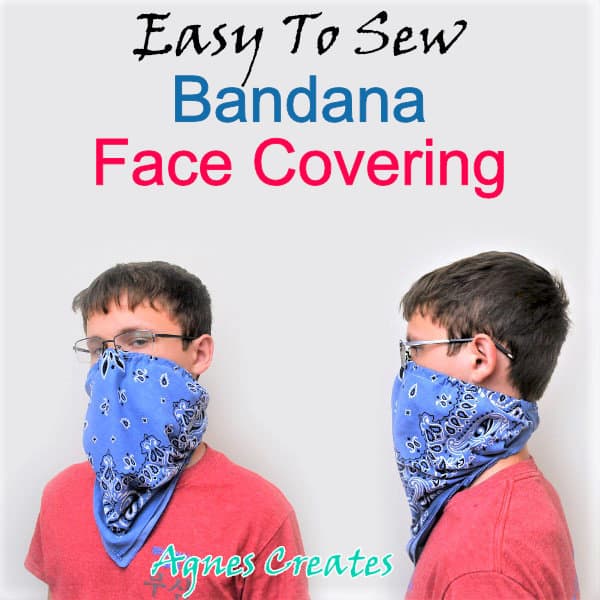
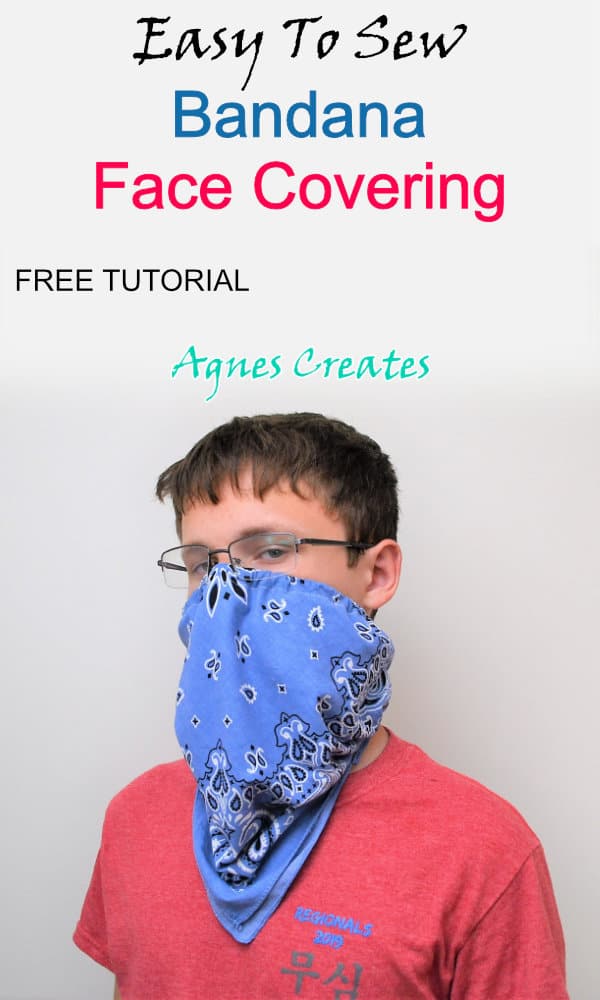
Learn how to sew a bandana face mask! I’ll teach you how to sew a face-covering out of bandana that is perfect for kids going back to school!
My teenaged son is going back to school in a couple of weeks and it’s mandatory for the kids to wear a face covering. And, that’s why I came up with easy to sew a bandana face mask. It’s super easy to sew and very comfortable to wear throughout the day. Also, the bandana mask makes snack time super easy. You pull the mask down and shovel some food into your mouth.
I have sewn face masks for myself and my kids before. Check out my post on a DIY face mask with filter pocket and nose wire and also DIY no-sew double-layered face mask. Both of the masks you wear over the ears, and that might be uncomfortable while wearing for longer periods of time. That’s why I made the bandana face mask with the thought of giving the ears a break.
Let’s get ready to sew face-covering using bandana!
So, of course, you’ll need a bandana for this easy sewing project. And, the best size is 22 x 22” bandana that you can get in a wide range of colors. I bought mine at the local Hobby Lobby store, but you can find more colors and patterns on Amazon. This post contains affiliate links for your convenience (which means if you make a purchase after clicking a link I will earn a small commission but it won’t cost you a penny more)!
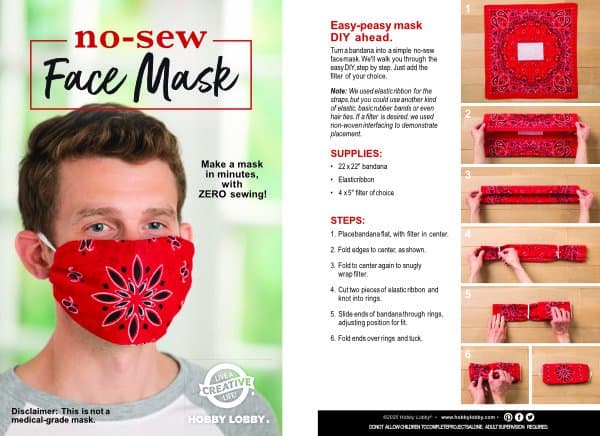
While cruising around the store, I found a free flyer with a DIY no-sew bandana face mask tutorial. You can follow the steps on how to make the mask in the picture below.
Both of the bandana masks have more than one layer and that’s what the CDC guidelines recommend.
I’m happy to share with you, how to sew a bandana face-covering!
Remember to always wash and dry fabric ahead of time to preshrink it
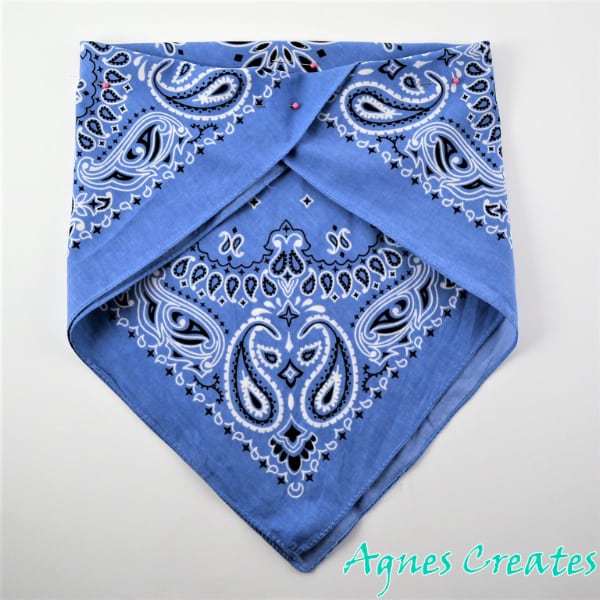
Step 1. First, fold the bandana in half to make a triangle. Then, have one corner slip, about 4.5” inside the other. As you see in the picture, I put the right corner inside the left corner. Pin, to keep the corners together and also place a couple of pins around the folded edge.
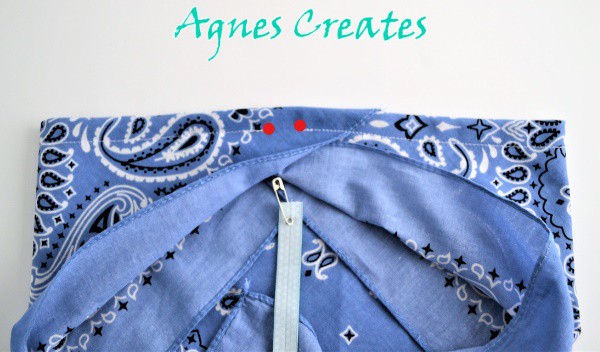
Step 2. Next, stitch around the bandana, about 0.75’ from the folded edge. Start stitching from the slipped one inside the other corners and also make sure to leave an opening.
Cut about 16” long elastic and using a safety pin, push through the casing. Make a knot with the two ends of elastic and push the knot inside the casing. You can stitch the opening closed but its not necessary.
Step 3. Finally, make four or five, 0.5” pleats on the sides of the bandana. Pin the pleats first and then stitch close to the edges.
And, that’s all! Wasn’t sewing the bandana face mask super easy project?
My son said that the face mask is stylish enough for teens to wear, lol. And, I love it too because is very comfortable. Also, bandana face-covering makes a nice scarf.
I hope you found my tutorial on how to make a face mask out of a bandana useful. Also, you can share a picture of your DIY bandana face mask on my Facebook page.