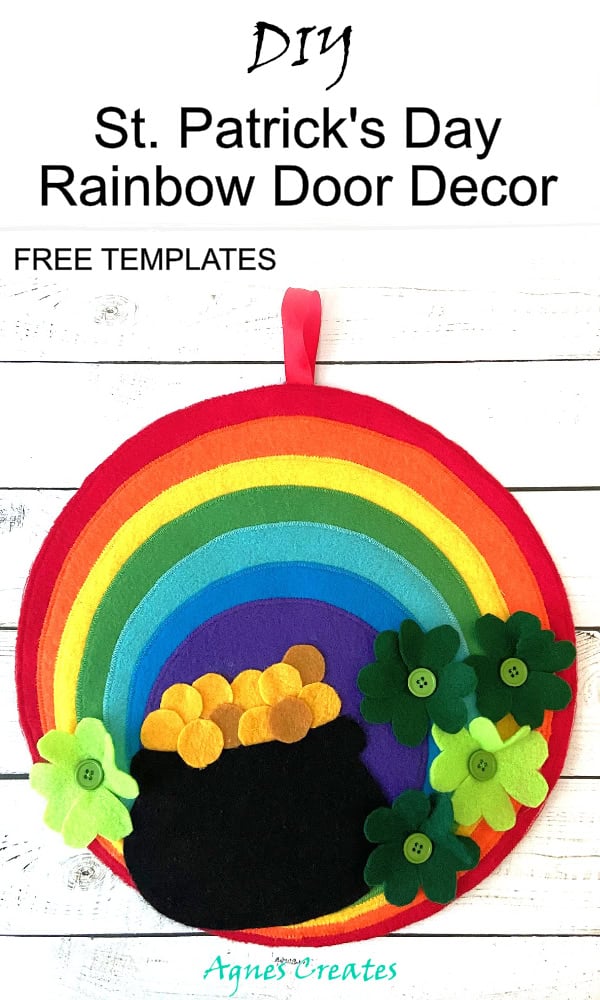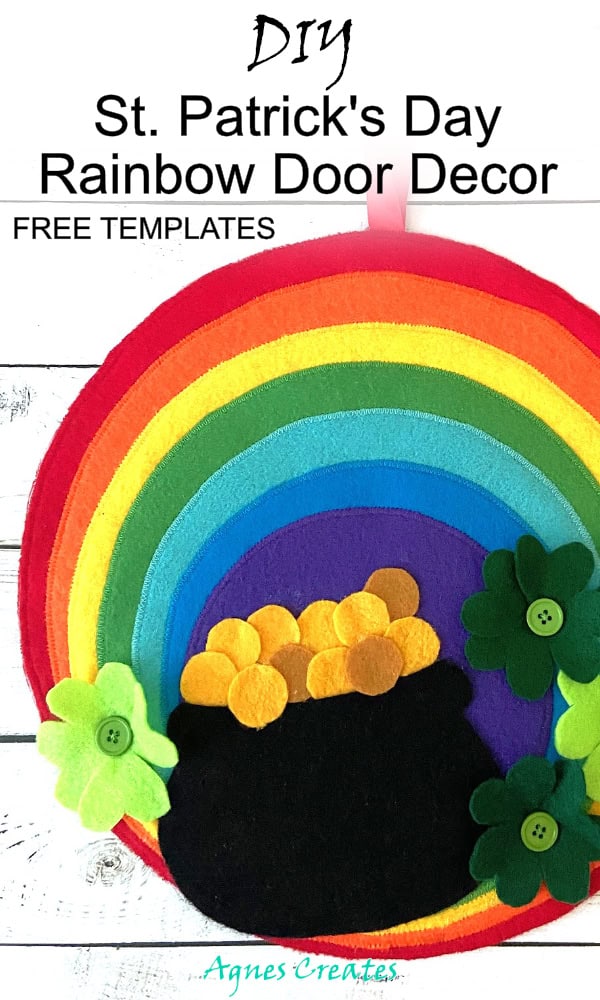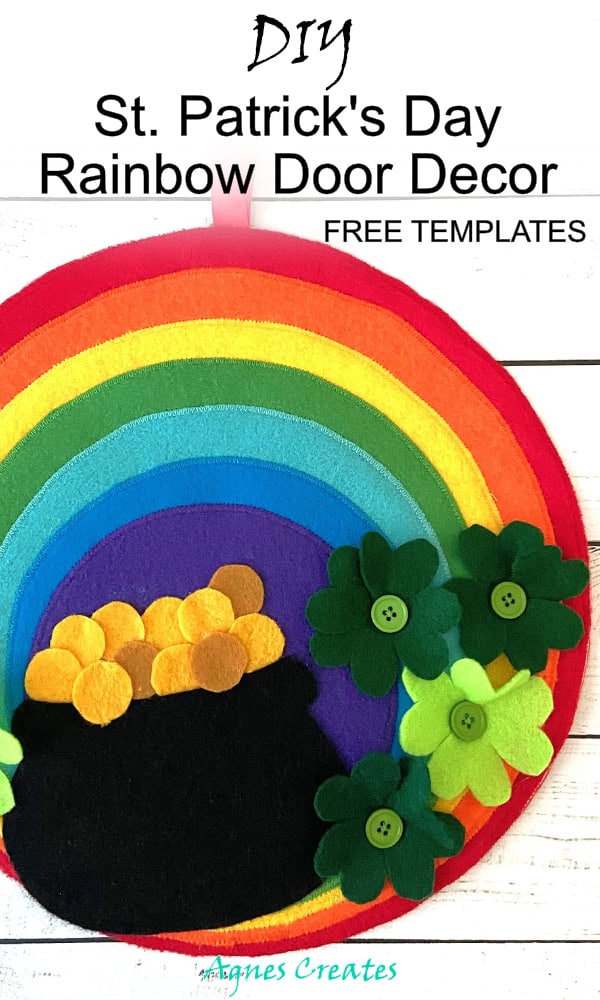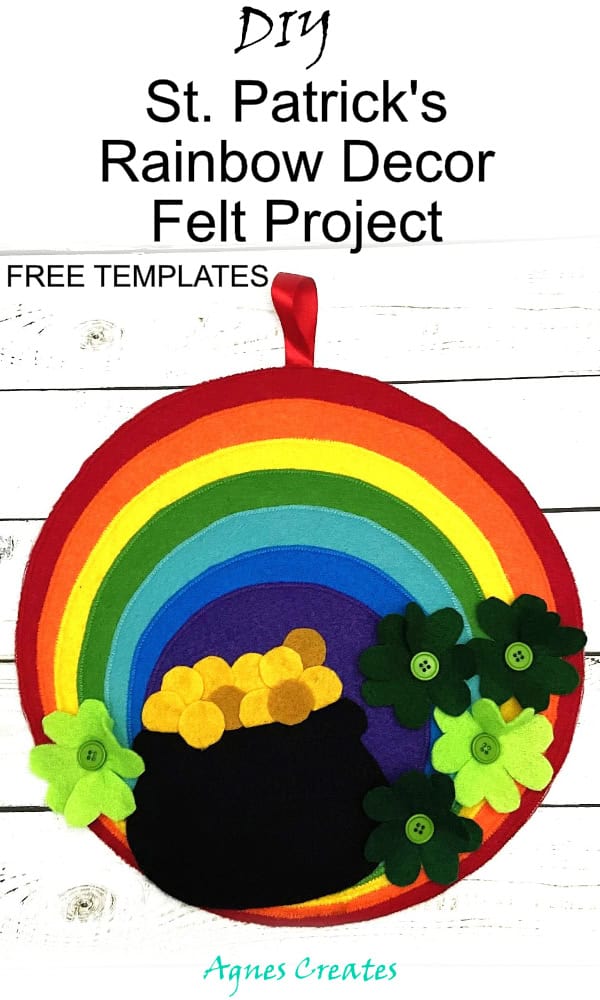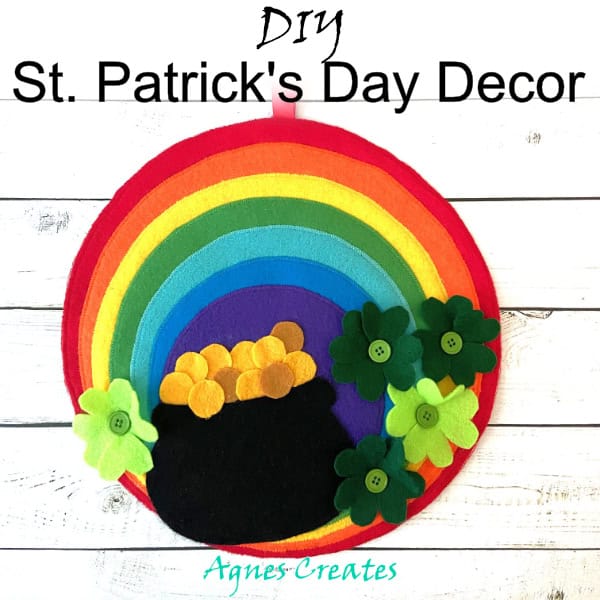
Decorate your home with DIY St. Patrick’s Day rainbow decor! Follow my easy and quick felt rainbow decor idea!
I designed this DIY St. Patrick’s Day rainbow decor felt project to decorate my front door for St. Patrick’s Day. You can make this felt door decor idea using your sewing machine by stitching all the rainbow pieces together. Alternatively, you can use embroidery floss and stitch using blanket stitch. Or, use a fabric glue.
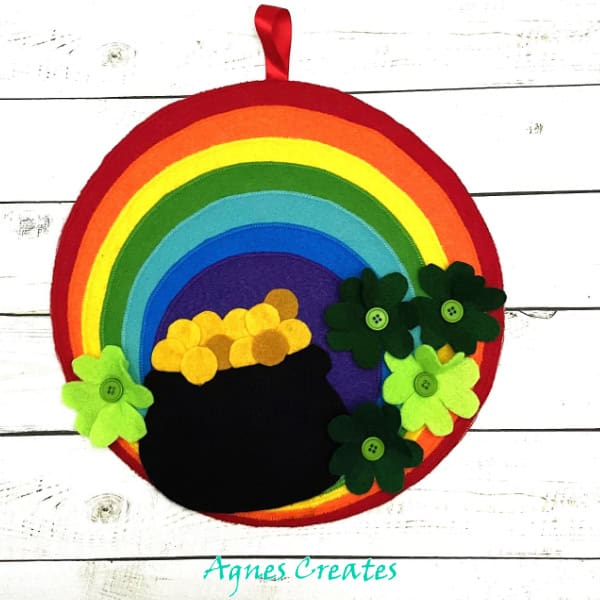
You’ll need bigger pieces of felt for the three first colors of the rainbow circle pieces. That means red, orange, and yellow. Buying those felt colors by the yard or the 12×18″ sheet size would work. This post contains some affiliate links for your convenience (which means if you make a purchase after clicking a link I will earn a small commission but it won’t cost you a penny more)! I always recommend products I tried, use, and love.
What you need for DIY St. Patrick’s Day Rainbow Decor
-
felt sheets 12×18″ size – 2 red, 1 orange, and 1 yellow color
-
felt sheets 9×12″ size – green, light blue, dark blue, and purple
-
scraps of felt in gold, dark, light green, and black
-
medium weight iron on interfacing,
-
all the felt colors matching sewing machine thread, or embroidery floss
-
green small buttons
-
6″ of red ribbon 3/8 or 0.5 inch wide
-
fabric pins
-
fabric glue E6000 or hot glue gun
-
sharp detailed scissors
-
sewing machine – I love my Janome
-
free templates for the rainbow decor are ready to download at my resource library– to get the password, fill out the form at the bottom of this post.
Follow my step-by-step DIY St. Patrick’s Day Rainbow Decor Felt Project
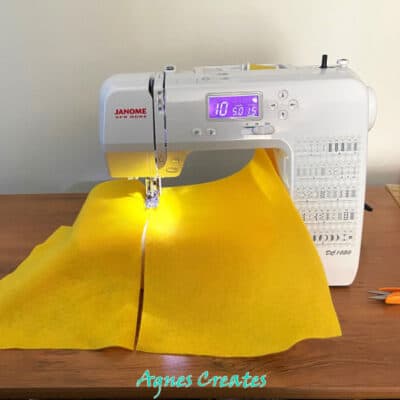
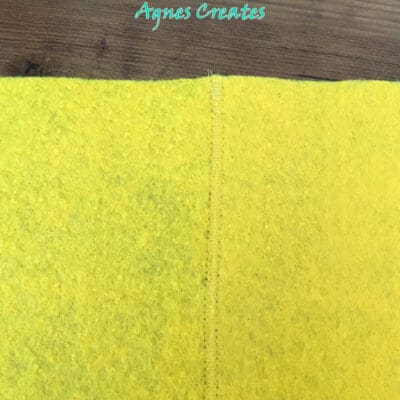
Step 1. If you don’t have 12×18″ felt sheets for the rainbow circles, you can zig-zag stitch two 9×12″ felt sheets together. That’s what I did. Use a zig-zag stitch on your machine in 5 x 1.5 size.
Step 2. Print out the free pdf rainbow, pot of gold, and shamrock template. Tape the template pieces together and cut them out.
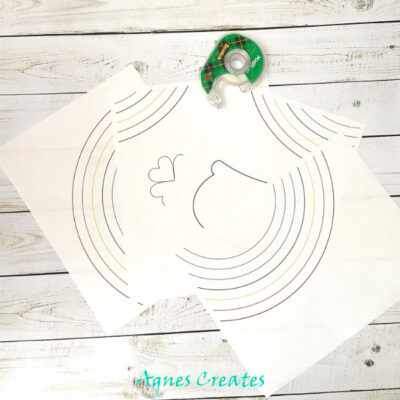
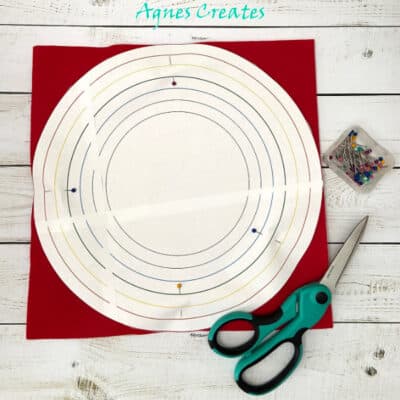
Step 3. Pin the rainbow template to the two red felt pieces and cut out two red circles.
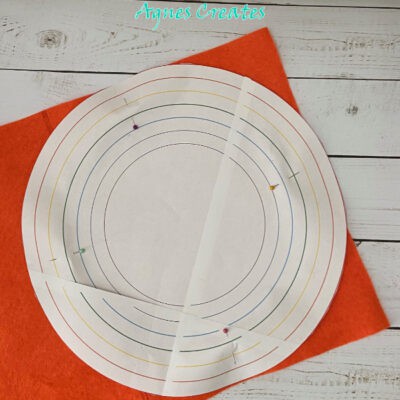
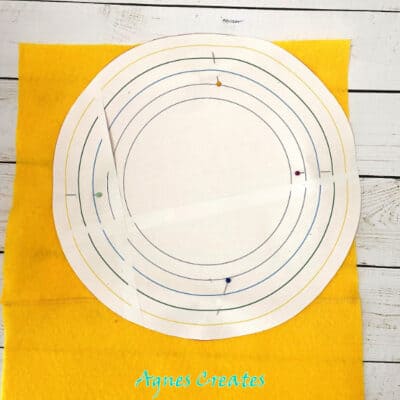
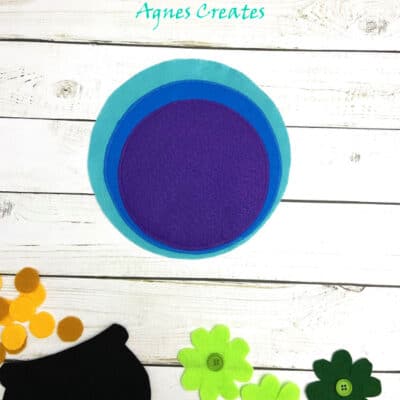
Repin the rainbow template to the next colors of felt sheets. Cut the individual colors by following the colored lines.
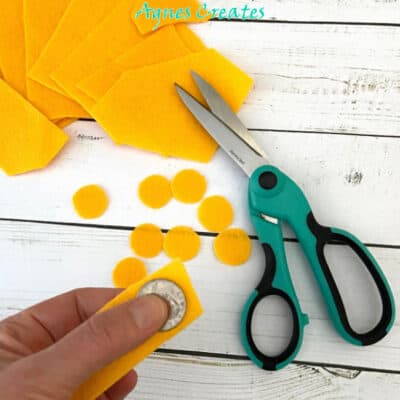
Use the gold colors of felt to cut out the gold coins. As a template you can use a quarter. Hold the quarter with felt together and cut around it. If you have a premium (thicker) black felt, use it to cut out the pot. It is not necessary.

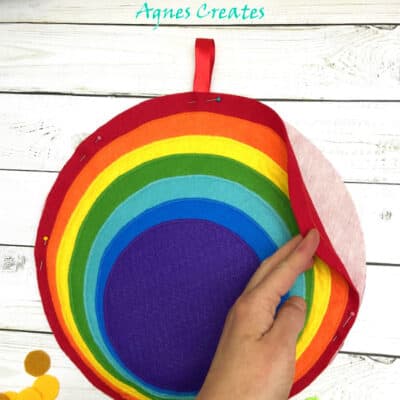
Step 4. Iron the interfacing on one of the red circles.
You can use a sewing machine to stitch the rainbow pieces together, or handstitch them with embroidery floss and using blanket stitch. The other option is to glue them together using fabric glue.
I chose to use my sewing machine. If you did to, as you see, you need to change the thread to match the individual felt circles color. Start stitching the purple to dark blue. Otherwise, you would end up stitching, through seven layers of felt. I don’t think that would be doable.
Step 5. Pin the red felt circle with interfacing to the rainbow circle, left side together. Fold the 6″ red ribbon in half and pin between the circle pieces, on top. Stitch around using a zig-zag stitch.
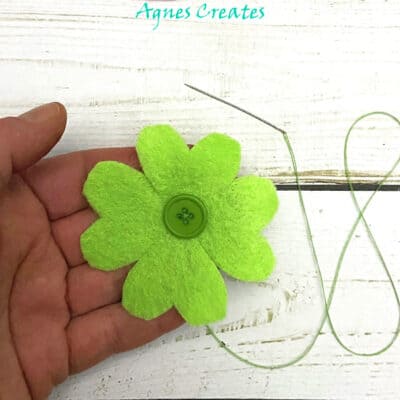
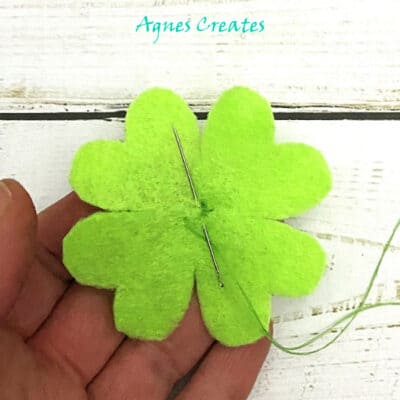
Step 6. Handstitch buttons to the center of a cloverleaf. On the back of the cloverleaves, make a few stitches and pull the thread to ruffle the leaves. Secure the thread and cut the thread tail.
Step 7. Use hot glue gun or fabric glue to glue all the pieces together. How do you like your DIY St. Patrick’s Day Door Decor?
Please share a picture of your DIY St. Patrick’s Day door decor on my Facebook or Instagram page. You may also like other of my felt decor ideas:
-
DIY felt apple coaster and matching
-
apple placemats felt DIY project
-
daisy placemats and coasters sewing pattern
-
DIY tooth fairy pillow felt project
-
icicle angel ornament felt pattern
Happy Crafting!
Love,
Agnes
Want To Remember This? Save The DIY St. Patrick’s Day Rainbow Decor Felt Project To Your Favorite Pinterest Board!