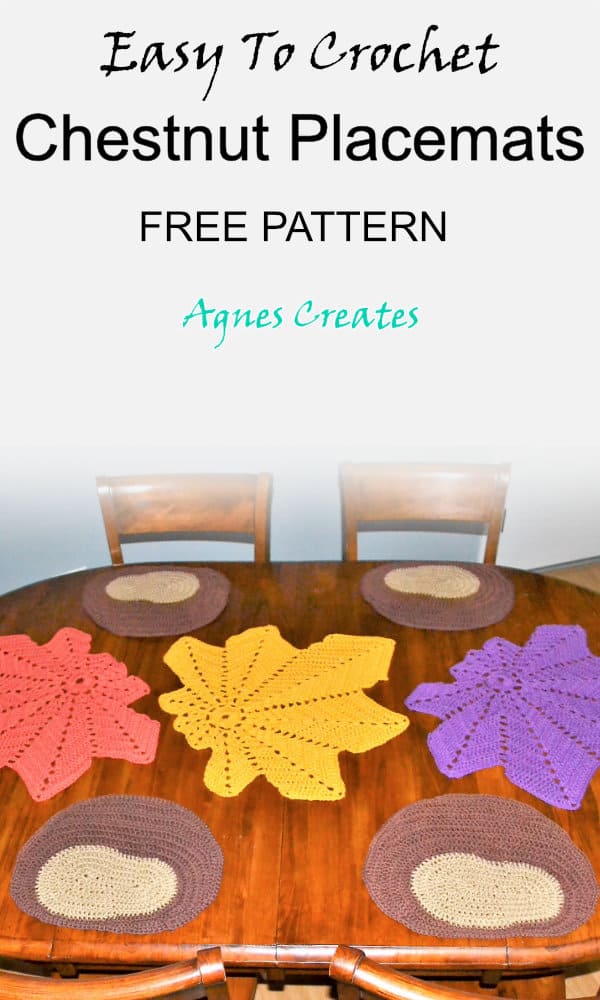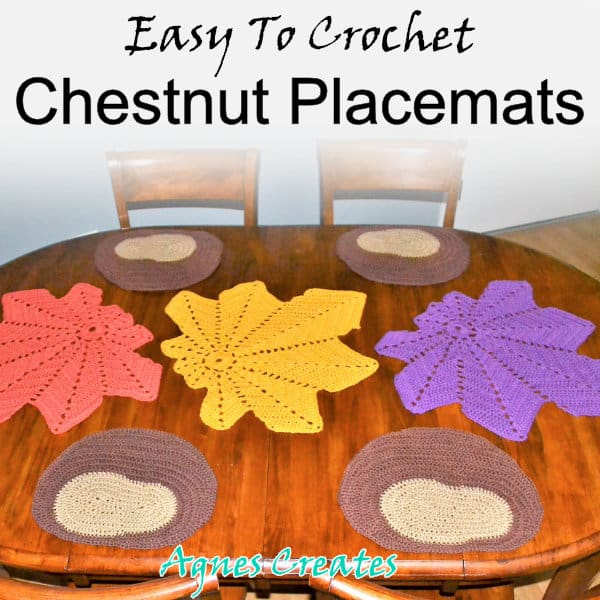
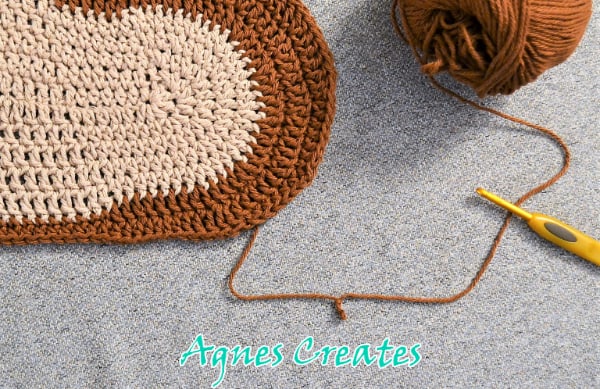
Follow my free chestnut placemat crochet pattern and learn how to crochet fun placemats to decorate your table! It’s a great fall and winter décor crochet idea!
So, I designed this chestnut placemat crochet pattern after I found and followed the free chestnut leaf crochet pattern. I think the crochet chestnuts and crochet leaves create some beautiful crochet fall table décor. Also, the crochet chestnuts may work nicely as Christmas crochet décor. I may design a fire crochet table runner to have some “chestnuts roasting on an open fire”!
I’m sure you are getting into the Christmas spirit already and you may like my free angel ornament crochet pattern. It would make a beautiful handmade gift for your loved ones. Also, you may like to use my free Christmas tree crochet pattern to crochet winter scene décor. This post contains affiliate links for your convenience (which means if you make a purchase by clicking a link I will earn a small commission but it won’t cost you a penny more)!
What you need to crochet a chestnut placemat
-
Bernat Handicrafter cotton yarn- warm brown and jute colors
-
Crochet hook H 5.0mm – Clover brand is my favorite
YOU CAN PURCHASE AN AD-FREE PDF PATTERN OF THE CHESTNUT PLACEMAT AT MY SHOP.
Abbreviations:
ch – chain
sl st – slip stitch
hdc – half double crochet
dc – double crochet
sc – single crochet
Instructions:
1. Using the jute color yarn Ch 14 and follow the chestnut center diagram
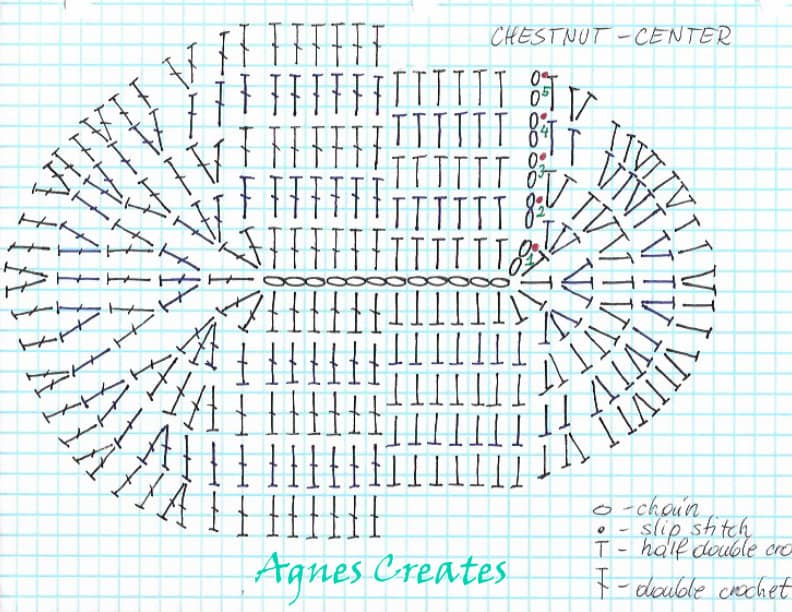
2. Join (yarn over with warm brown color of the yarn and draw a loop through the last jute color yarn hdc),
rnd 1: ch2, dc in next 6 sts,
sc in next 8 sts,
*2sc in next st, sc in next 3 sts* – x3,
2sc in next st,
sc in next 6 sts,
2sc in next st,
sc in next 14 sts,
dc in next 7sts,
*2dc in next st, dc in next 3 sts* – x4,
2dc in next st
dc in 7 next st
sl st to top of ch2.
rnd 2: ch2, dc in next 8 sts,
*2dc in next st, dc in next 4 sts*, – x5
2 hdc in next st,
hdc in next 2 sts, (place marker but not necessary)
sc in next 2 sts,
2sc in next st,
sc in next 14 sts,
hdc in next 4 sts,
2hdc in next st,
*dc in next 4 sts, 2dc in next st* – x5 (place marker after x1)
dc in next 6 sts
sl st to top of ch2.
rnd 3: ch2, dc in next 12 sts,
*2dc in next st, dc in next 5 sts* – x4
2dc in next st,
dc in next 2 sts,
hdc in next st,
sc in next st,
sl st in next st.
Remove the marker and finish off.
(RS) sl st to the other marked stitch,
sc in next 5 sts,
2sc in next st,
hdc in next 5 sts,
2hdc in next st,
dc in next 5 sts,
2dc in next st,
dc in nex 5 sts,
2dc in next st,
dc in next 5 sts,
sl st to top of ch2 and finish off.
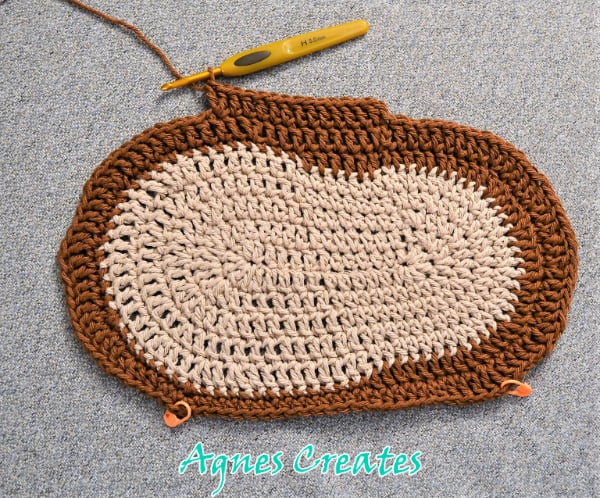
rnd 4: make a knot with the yarn tail from the previous sl st,
sc in next 6 sts,
2sc in next st,
hdc in next 6 sts,
2hdc in next st,
hdc in next 6 sts,
2hdc in next st,
dc in next 6 sts,
2dc in next st,
dc in next 21 sts,
2dc in next st,
dc in next 6 sts,
2dc in next st,
dc in next 6 sts,
2dc in next st,
hdc in next 4 sts,
sc in next 2sts,
sl st in next st,
turn.
rnd 5: sl st in next st,
sc in next 7 sts,
2sc in next st,
sc in next 7 sts,
2sc in next st,
hdc in next 3 sts,
dc in next 4 sts,
2dc in next st,
dc in next 27 sts,
2dc in next st,
dc in next 4 sts,
hdc in next 3sts,
sc in next 4 sts,
ss in next st,
turn.
rnd 6: sl st in next st,
sc in next 8 sts,
2sc in next st,
hdc in next 2 sts,
dc in next 6 sts,
2dc in next st,
dc in next 6 sts,
2dc in next st,
dc in next 8 sts,
2dc in next st,
dc in next 8 sts,
2dc in next st,
hdc in next 4 sts,
sc in next 9 sts,
sl st in next st,
turn.
rnd 7: sl st in next st,
sc in next 9 sts,
2hdc in next st,
hdc in next 3 sts,
dc in next 3 sts,
*2dc in next st, dc in next 9 sts* – x3,
2dc in next st,
hdc in next 2 sts,
sc in next 2 sts,
sl st in next st,
turn.
rnd 8: sl st in next st,
sc in next 4 sts,
hdc in next 2 sts,
2dc in next st,
dc in next 10 sts,
2dc in next st,
dc in next 10 sts,
2dc in next st,
hdc in next 6 sts,
sc in next 2 sts,
sl st in next st,
turn.
rnd 9: sl st in next st,
sc in next 2 sts,
hdc in next 2 sts,
2dc in next st,
dc in next 11 sts,
2dc in next st,
dc in next 11 sts,
hdc in next 2sts,
sc in next 2sts,
sl st in next st,
turn.
rnd 10: sl st in next st,
sc in next 2 sts,
hdc in next 2 sts,
dc in next 16 sts,
hdc in next 2 sts (place stitch marker),
sc in every stitch around and sl st to the beginning sc,
finish off.
I hope you found my free chestnut placemat crochet pattern useful. You can post a picture of your crochet placemats on my Facebook page.
Happy Crocheting!
Love,
Agnes
Want To Remember This? Save The Chestnut Placemat Crochet Free Pattern To Your Favorite Pinterest Board!