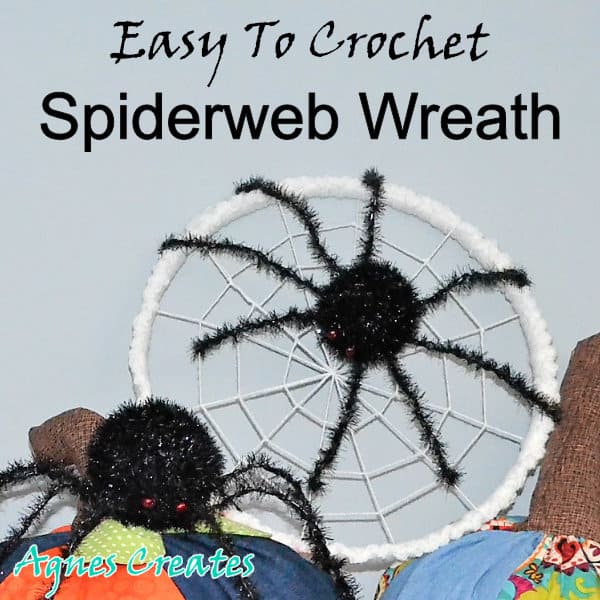
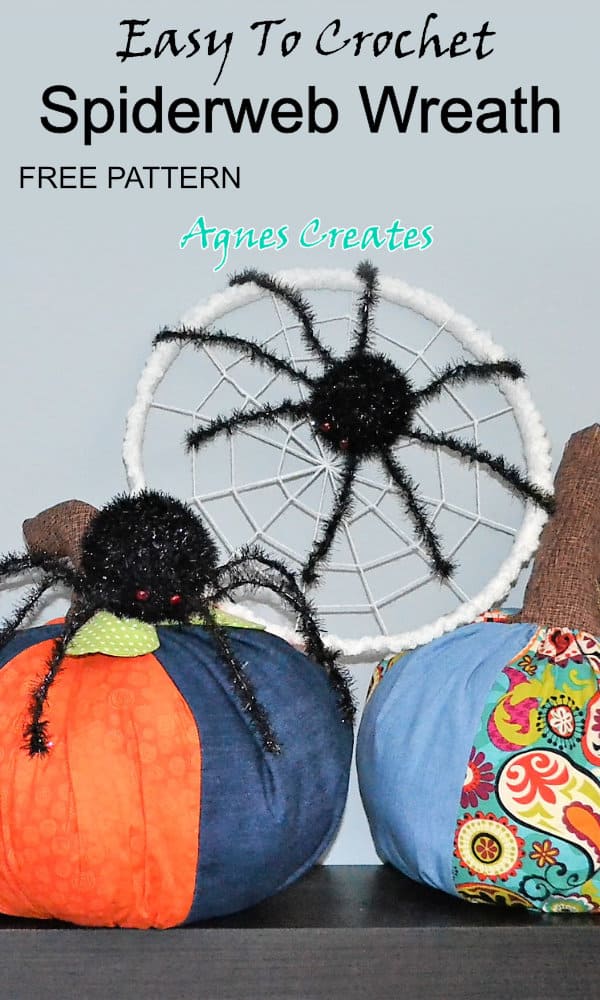
Follow a spiderweb wreath crochet pattern to make spooky front door Halloween décor! Includes a free spider crochet pattern that you can use for your fall décor crochet pattern ideas.
I designed the spiderweb wreath crochet pattern because my daughter asked me to make spiders to decorate our place for Halloween this year. I thought spiders would go well with fabric pumpkins that I made a couple of years ago. Also, that combination would make a nice fall decoration as well.
If you are looking for more fall décor ideas, then you need to check out my post on autumn centerpiece free crochet pattern. Also, another great fall free crochet pattern you’ll find by checking out my post on easy crochet fall wreath pattern. This post contains affiliate links for your convenience (which means if you make a purchase clicking a link I will earn a small commission but it won’t cost you a penny more)!
YOU CAN PURCHASE AN AD-FREE PDF PATTERN OF THE SPIDERWEB WREATH AT MY SHOP.
IT INCLUDES WRITTEN CROCHET PATTERN FOR THE SPIDERWEB WREATH AND SPIDER CROCHET PATTERN IN TWO SIZES. ALSO INCLUDES A TUTORIAL AND PICTURES ON HOW TO ASSEMBLE ALL THE PIECES TOGETHER.
Abbreviations:
ch – chain
ss – slip stitch
dc – double crochet
sc – single crochet
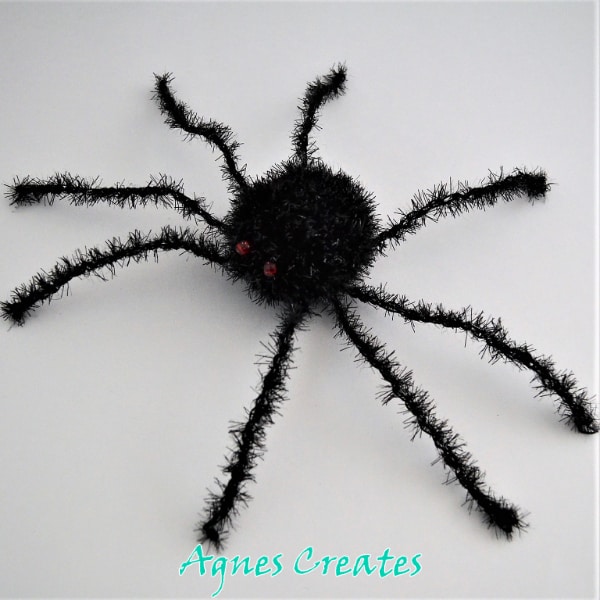
Follow the spider crochet pattern, which you can find in my other post about the east spider crochet pattern. You’ll learn how to crochet a spider in two different sizes.
Next, follow a spiderweb crochet pattern with a step-by-step tutorial.
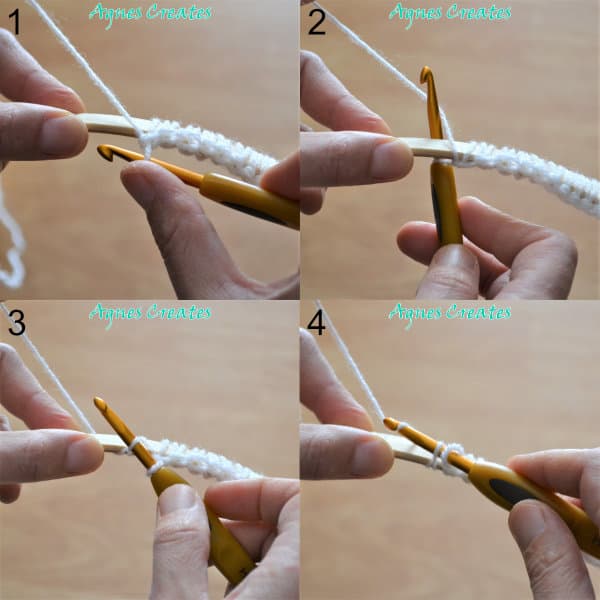
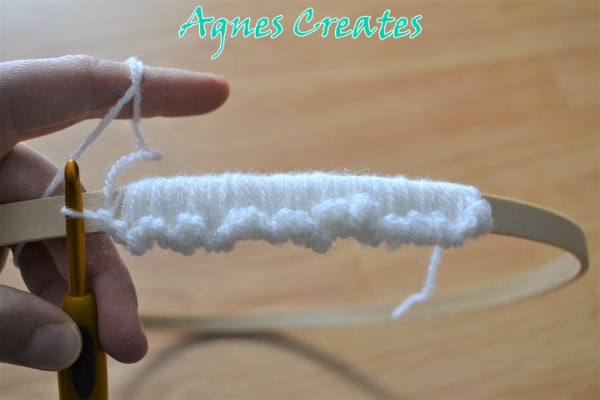
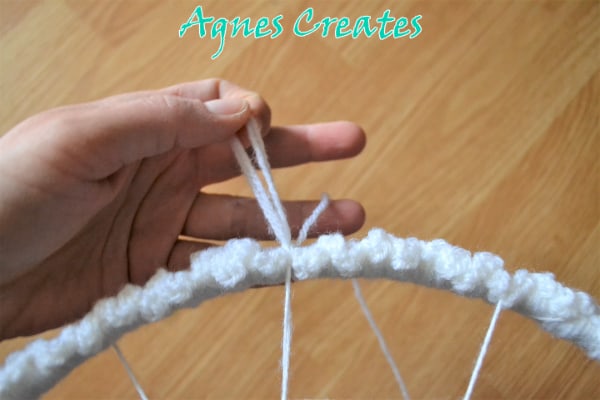
1. Make a knot with the white yarn anywhere on the embroidery hoop (you are using just one part of the embroidery hoop for this project).
2. With the crochet hook in front of the hoop, yarn over below the hoop and draw the yarn to the front. Now, yarn over the top of the hoop and draw the yarn through both loops.
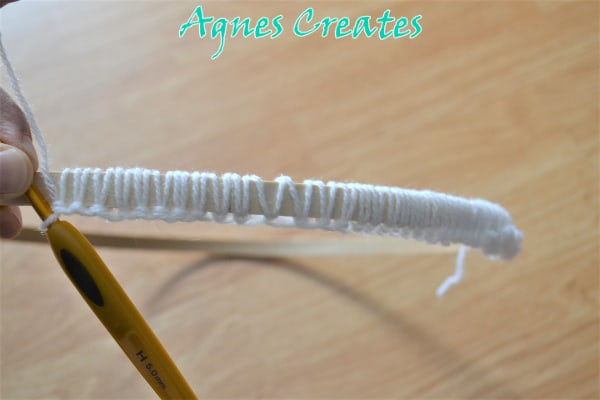
3. Repeat step 2 until the hoop is covered with yarn. Keep pushing the yarn stitches back in order to cover the hoop nicely.
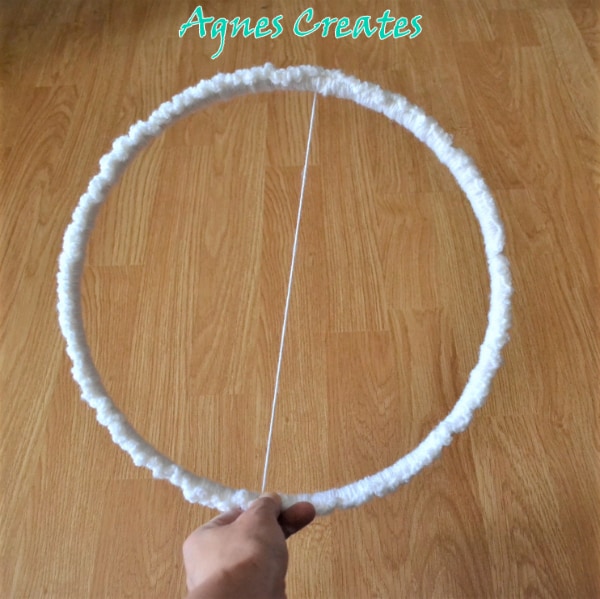
4. Cut the yarn leaving a long tail, about 2 yards. You can make a ball out of the yarn tail, to easily weave the web.
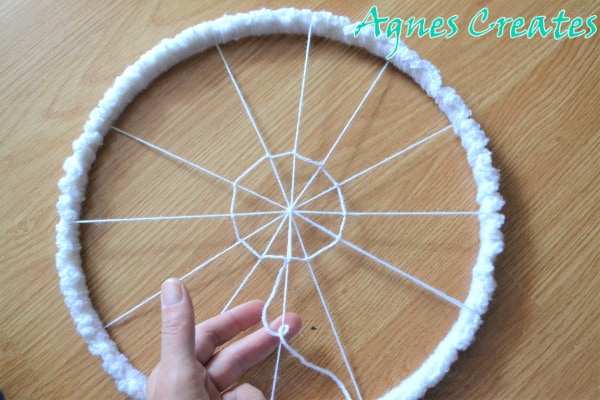
5. Stretch the yarn to the other side of the hoop and make two wide wraps around the loop to one side.
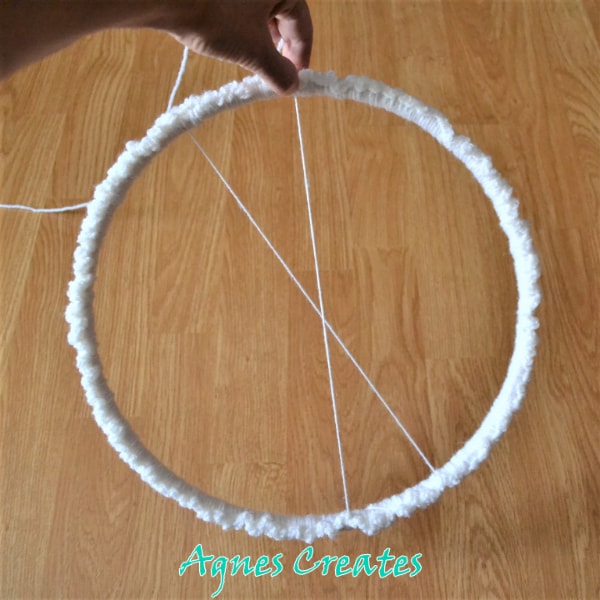
Repeat stretching and wrapping with the yarn until the loop is filled.
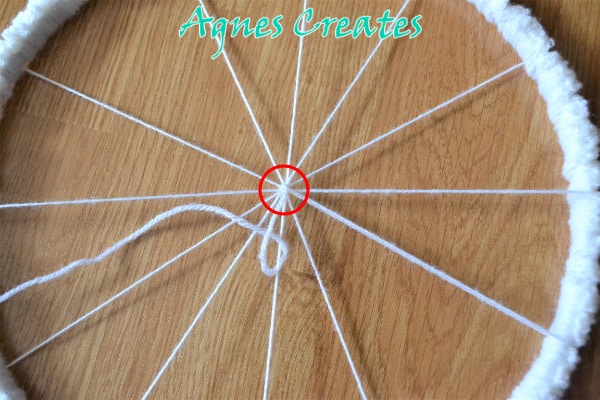
6. Then, stretch the yarn to the middle and make a knot or two around all the yarn. It will secure the middle of the web.
7. Next, stretch the yarn about 2” from the center, along one web string, and make a knot.
8. Then, stretch the yarn to the next web string and make a knot. Repeat this step to make the first row on the web.
9. To make the next row of the web repeat steps 7 and 8. Make as many rows as you like. It also depends on the size of the hoop.
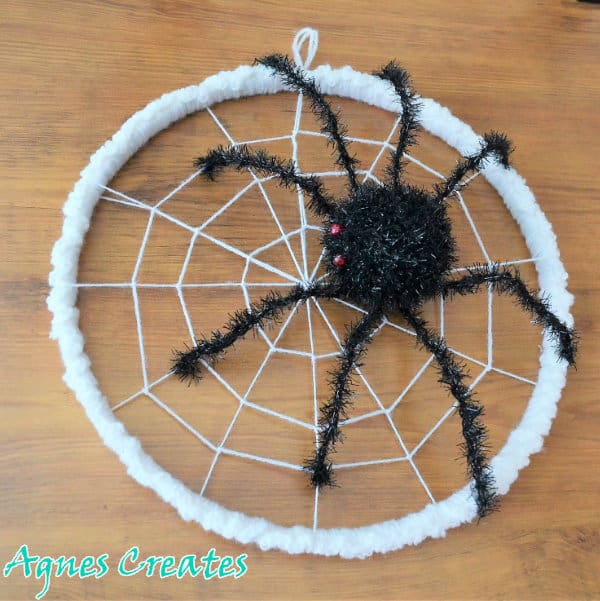
10. When finish making web rows, stretch the yarn to the hoop and make a loop to use to hang the spiderweb.
Finally, hot glue the spider to the web.
Although it’s a spiderweb wreath to hang on the door you can put it on the shelf as I did. I hope you found the spiderweb wreath crochet pattern useful and easy to follow. You can share a photo of your crochet spider decoration on my Facebook page.
Happy crocheting!
Love,
Agnes
Want To Remember This? Save The Spiderweb Wreath Free Crochet Pattern Pin To Your Favorite Pinterest Board!