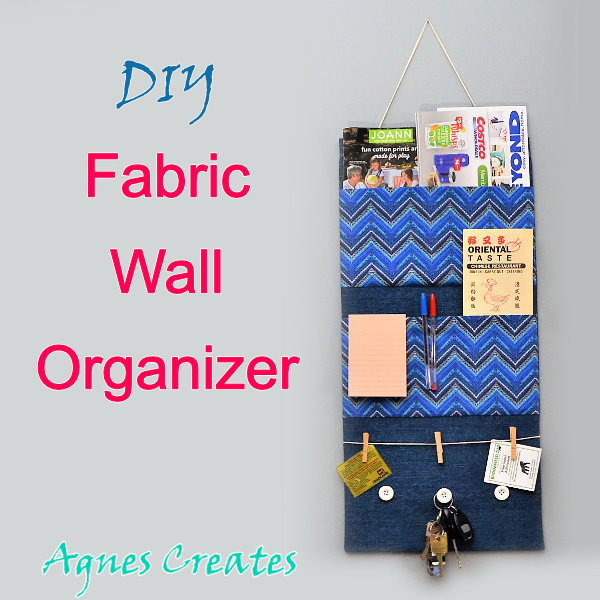
Learn easy to make DIY Fabric Wall Organizer that is perfect for decluttering! I’ll teach you how to sew a wall hanging organizer with pockets that is very practical for mail and keys!
I always liked to have my house nicely organized, especially since our living space is very small. Lately, all the coupon booklets and restaurant menus have started taking over my tables. So, I made a DIY fabric wall organizer that is a spacious solution to put all the clutter in.
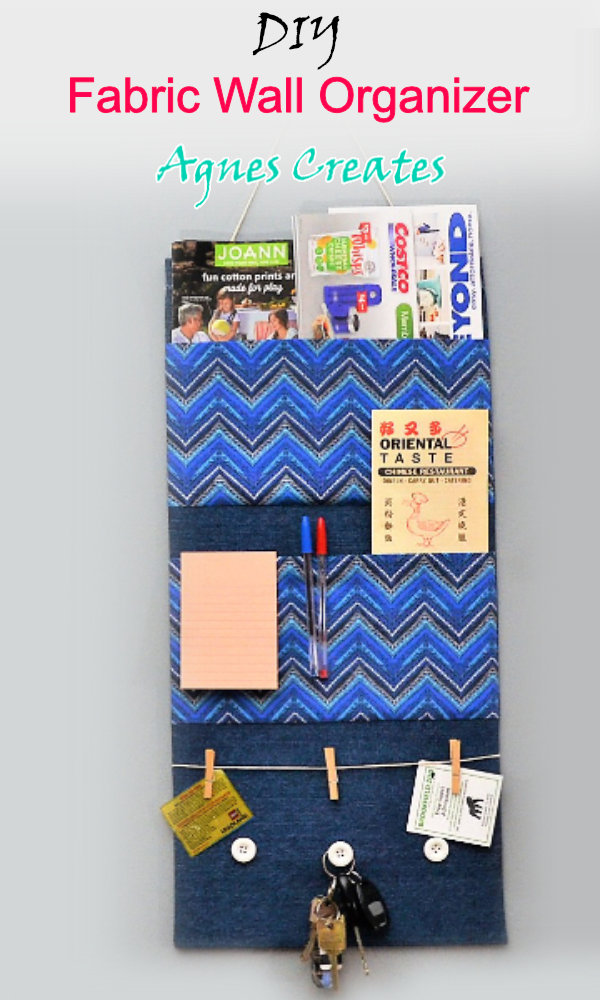
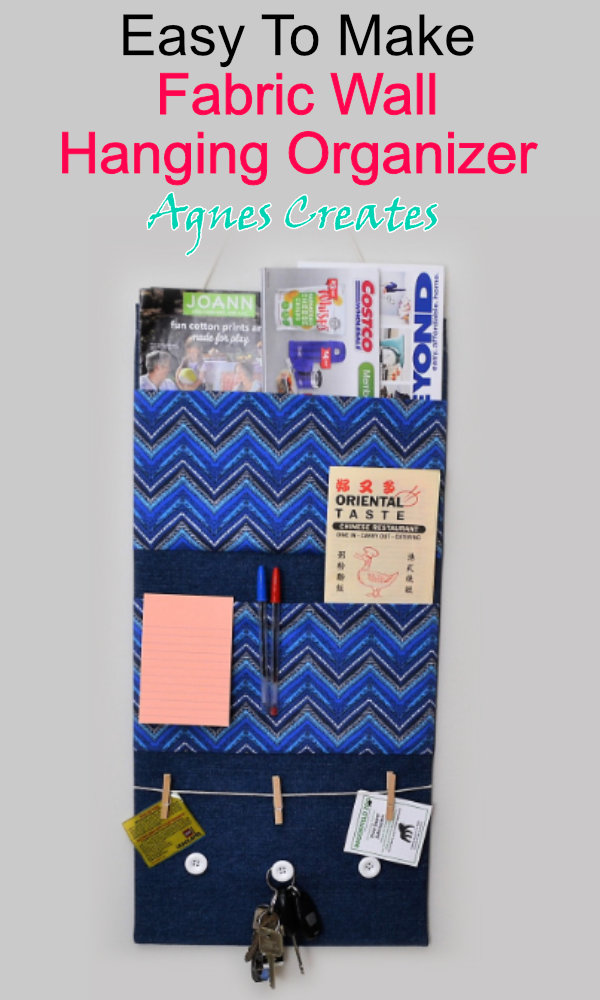
Also, with all the technology now, I am still old school. I like having a grocery list written on a piece of paper. And, the pocket wall organizer has a space to slip in a notebook and pens as well. As you see it in the picture, there is also space to hang keys and clip some notes.
I really like how the hanging fabric organizer turned out. At first, it seems small, but you can arrange lots of stuff in it. This post contains affiliate links for your convenience (which means if you make a purchase after clicking a link I will earn a small commission but it won’t cost you a penny more)!
If you are looking for DIY organizing ideas to use in your car, then you need to check my post on how to sew a car seat organizer. Also, this DIY lap desk with pockets is an awesome travel activity, an organizing and road trip entertaining idea for kids.
Let’s get ready to make a DIY Fabric Wall Organizer for your home!
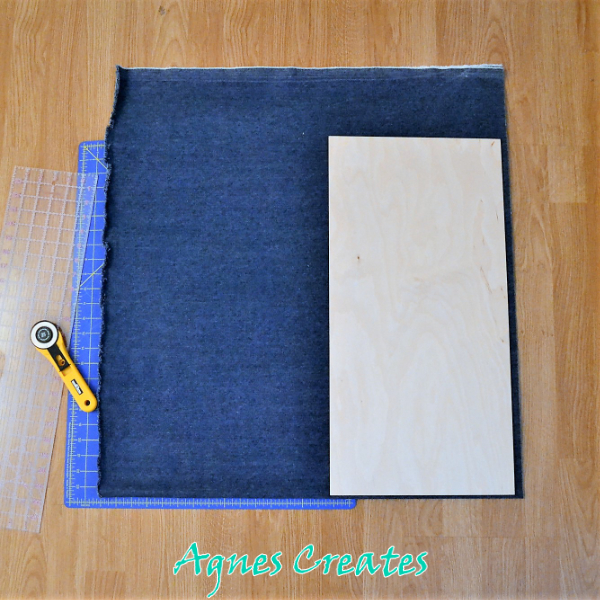
You need to use a thicker fabric to sew the organizer, and denim works great. For the pockets, you can use quilting fabric that you can get as a fat quarter.
So, to make the wall organizer, you need thicker fabric, and not all basic sewing machines are able to stitch through a few layers of fabric. If you are looking for a good basic sewing machine, then look into the Janome brand. You’ll find them not overpriced but of great quality, and Janome machines work awesome. I specifically have DC1050 and I just love it!
I’m happy to teach you how to sew a DIY Fabric Wall Organizer!
Always wash and dry fabric ahead of time to pre-shrink it, which will also make it easier to cut the fabric.
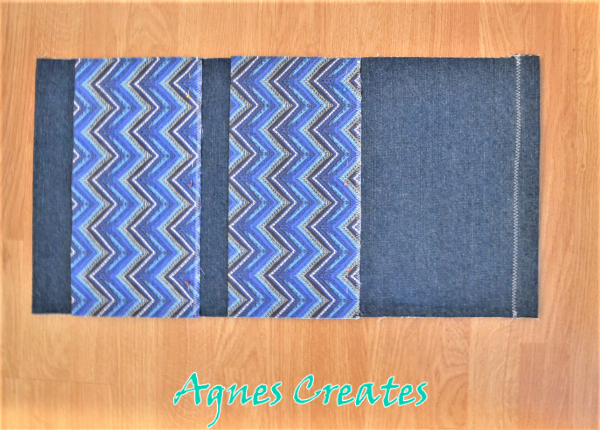
Step 1. First, fold the denim fabric in half and cut 13” wide strip. And, the folded piece should be 26” long.
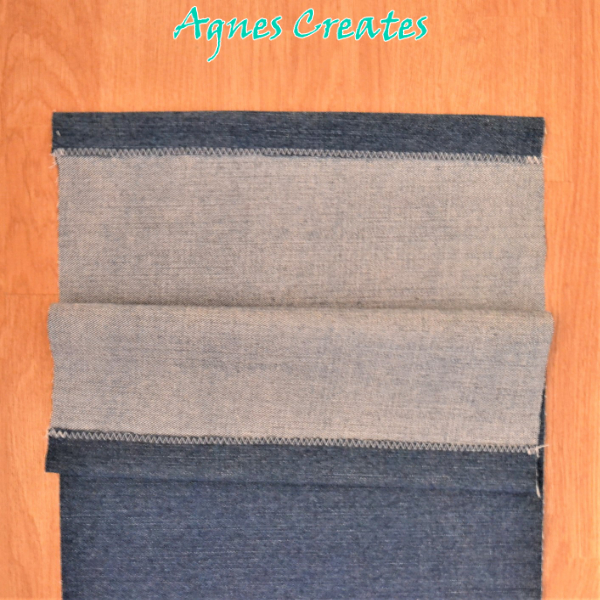
Step 2. Fold the short edges 1 1/4” to the wrong side and iron them flat. Then, stitch using a zig-zag stitch along the short edges.
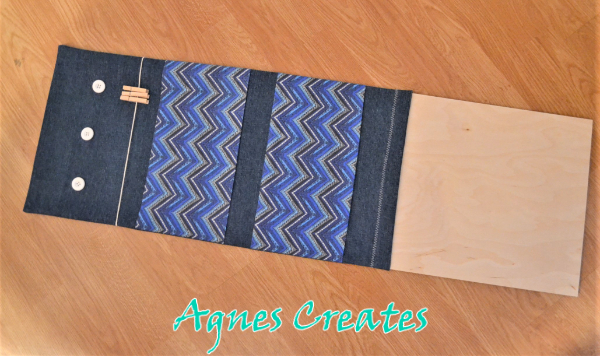
Step 3. Now, about 3.5” from the bottom mark spots for the buttons and then sew them on.
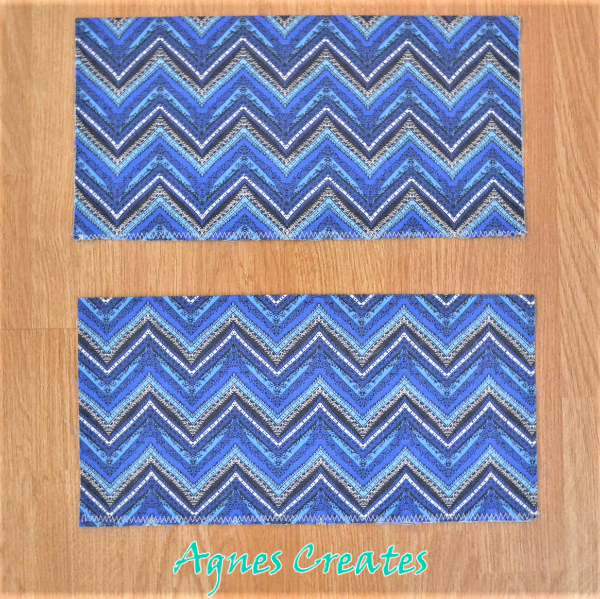
Step 4. Cut two, 13×13” squares out of the quilting fabric, fold them in half and iron flat. In order to keep the raw edges aligned stitch them using a zig-zag stitch. Those two rectangles are the pockets for the organizer.
Step 5. Measure 8.5” and 16.5” from the bottom of the folded denim piece and mark on both sides.
Now, pin the two fabric pocket pieces on the level of the marks. Of course, with the finished edges going up. Then stitch, using a regular straight stitch and about 3/8” seam allowance from the edge.
Lift the pocket pieces up and iron the seam flat and also aligning the side edges with the denim piece.
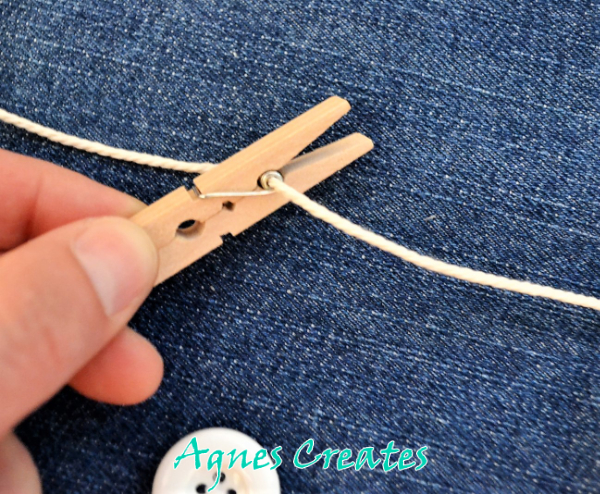
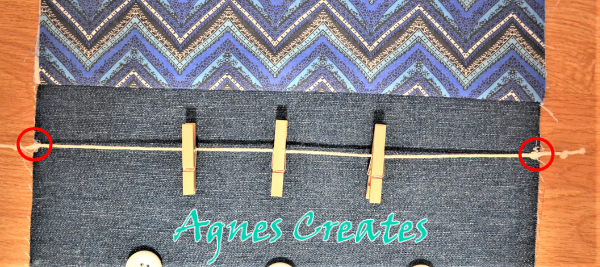
Step 6. Now, cut about 17” long cotton rope and thread the clothespins on. You need to push the rope through the pin’s spring in order for the pin to stay on the rope.
Make knots on both ends of the rope and then pin them about 1” below the lower pocket. Using a zig-zag stitch, stitch the rope in place.
Step 7. Nicely align the denim piece right side together making sure that also the pockets are in place. Pin first and then stitch the long edges together.
Step 8. Turn the sewn project right side out and iron the seams flat. Now, you can push the plywood in.
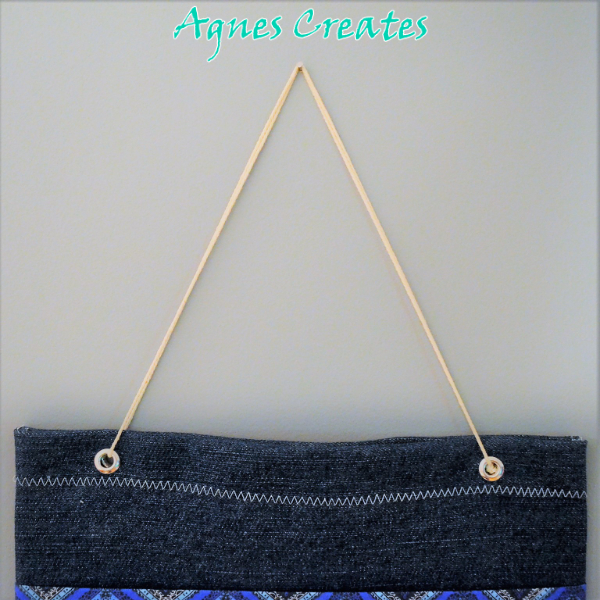
Step 9. Using the eyelet pliers install the ¼” eyelets in the middle of the upper hem of the organizer. Two eyelets on both sides each and on this same level. You can have them installed about 2” from the sides.
It’s super easy to use eyelet pliers. Basically, you need to make holes first, using the attachments. And then, using different attachments on the pliers, you install the eyelets.
Step 10. Finally, cut 40” long cotton rope and weave through the eyelet openings. Make a knot with the rope ends and shift it to the back, so the knot is not visible.
And, that’s it! Now, you have a spacious wall hanging organizer to arrange some items in. If you are looking for a DIY organizer for your car, then check my post on how to sew a car seat organizer. It’s made with a thought to organize kids’ activity supplies, but you can use it for other items that you need to have in the car.
So, I hope you enjoyed making a DIY fabric wall organizer for your home, and you are happy with how it turned out. Also, you are welcome to share a picture of your organizer on my Facebook page.

1 thought on “DIY Fabric Wall Organizer Free Tutorial”