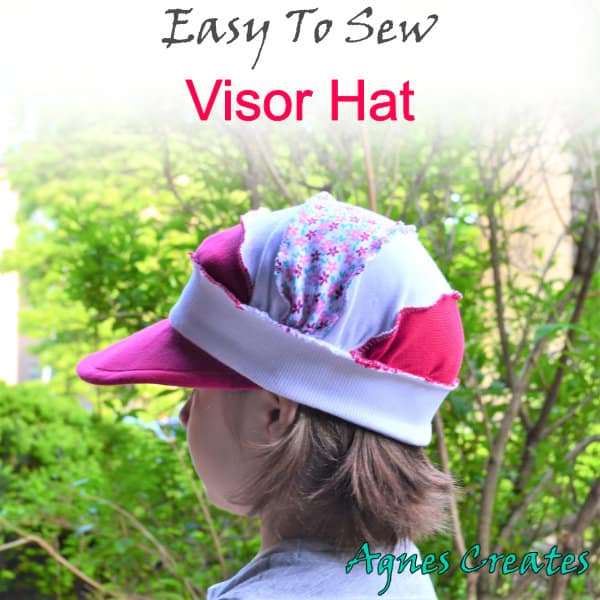
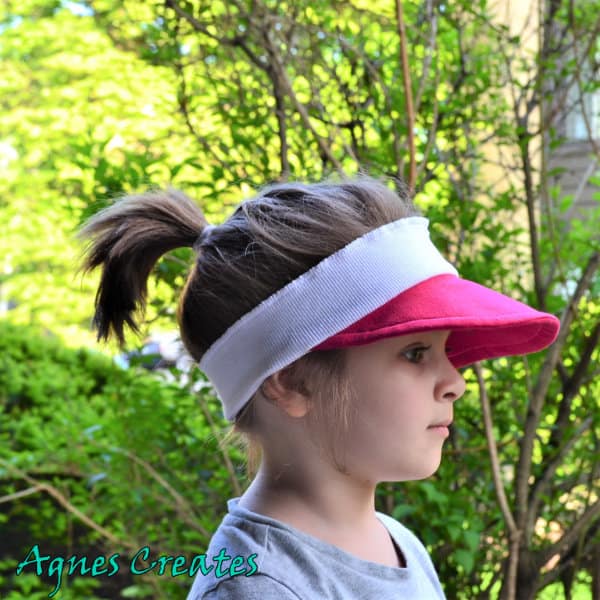
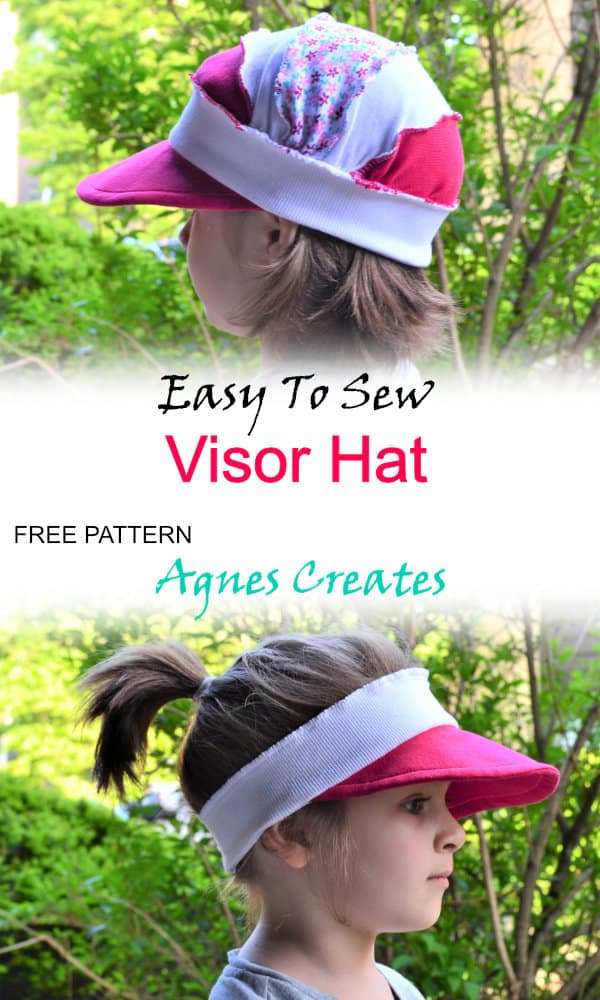
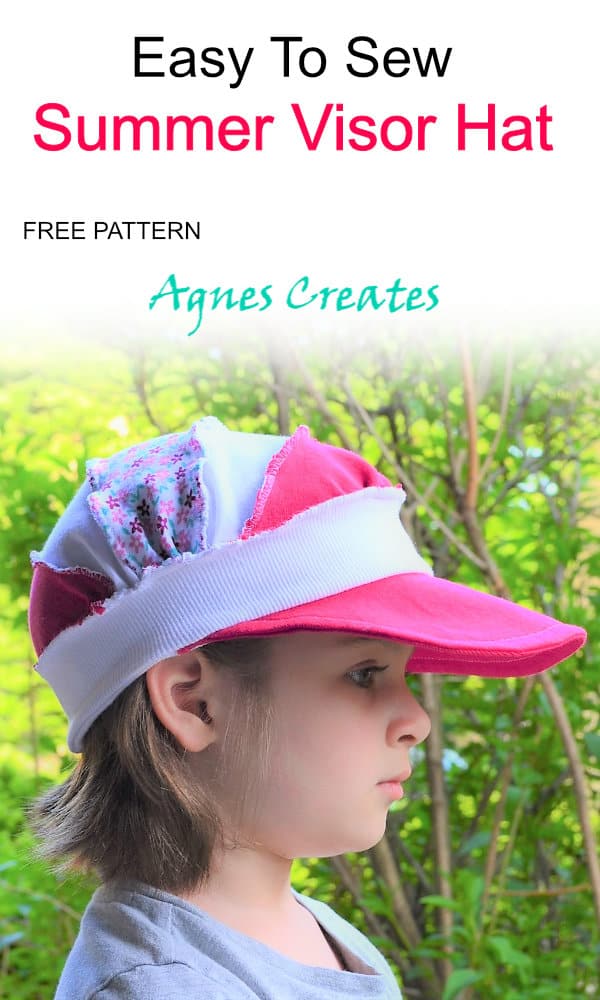
Are you looking for an easy to sew visor hat pattern for coming summer days? Then, follow my detailed tutorial and learn how to repurpose an old t-shirt into a beautiful visor cap!
It is the time of the year to stock up on summer hats, especially for my kids. And that’s why I designed easy to sew visor hat pattern to make a summer hat for my daughter. Also, you can use this same pattern but different colors of fabric and sew a visor cap for a boy as well.
Some time ago, I have designed a newsboy cap sewing pattern but I used regular quilting cotton fabric to sew the hat. For a change, I tried sewing a summer hat using knit fabric and I like how it turned out.
A lot of people are afraid of sewing with knit fabrics because knits are stretchy. Read my post on tips on sewing with knits and you’ll learn that sewing with stretchy fabric is easier than you think.
Let’s get ready to sew a visor hat!
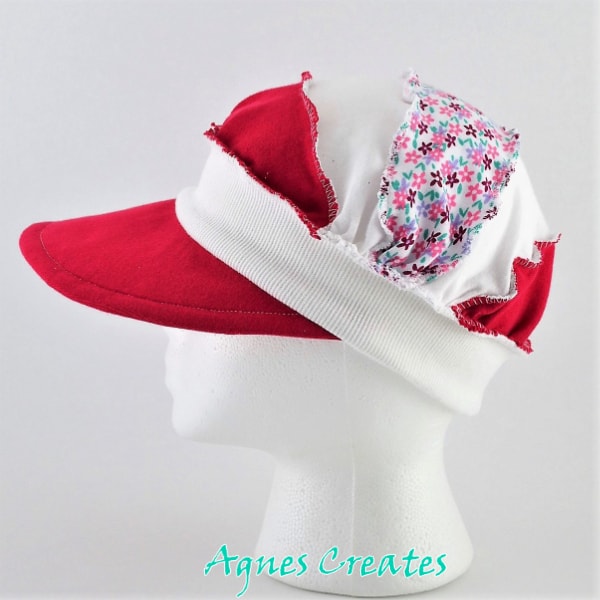
So, you need ribbed fabric or ribbed cuff trim, that it’s used for the band on the hat. You can either buy it or just cut it out from an old sweatshirt. Also, you can use old t-shirts to sew the visor and the hat’s crown. I’ve used scraps of knit fabric that I had leftover from sewing a beanie hat for my daughter in fall. And, I’ve also used my old t-shirt and that is the pink fabric as you see in the picture. This post contains some affiliate links for your convenience (which means if you make a purchase after clicking a link I will earn a small commission but it won’t cost you a penny more)!
visor hat free printable pattern that is ready to download in my resource library– to get the password to it just fill out the form at the end of the post
I am happy to teach you how to sew a visor hat!
This cap pattern is for a head of 20” in circumference. Also, always wash and dry new fabric ahead of time to pre-shrink it.
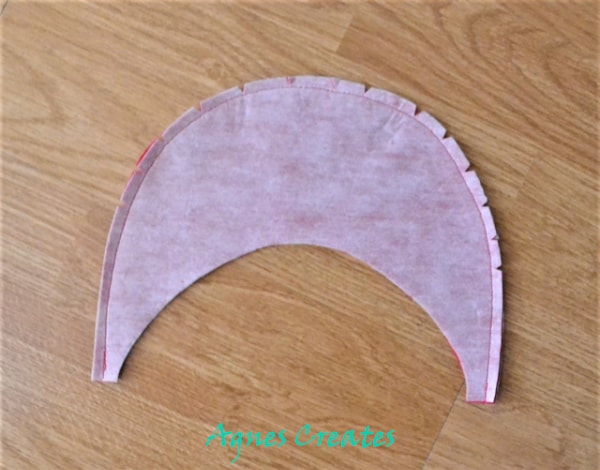
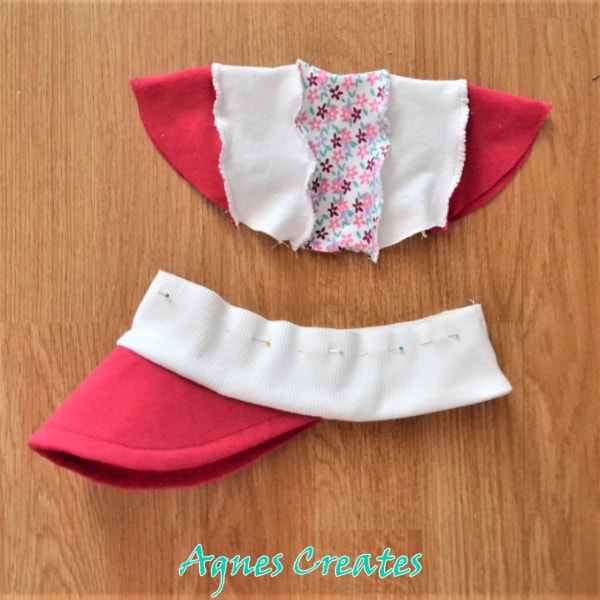
Step 1. First, let’s start to sew the visor, so cut the pieces out of the fabric. Then, iron on the interfacing to the left side of the fabric and trim the leftovers.
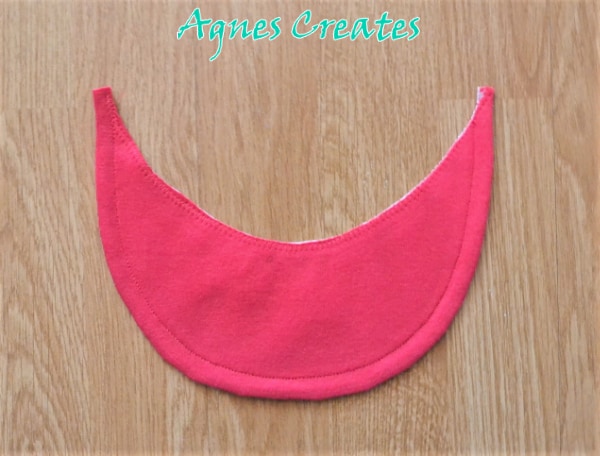
Pin the visor pieces right side together and stitch along just the outer curve. You don’t need to use knit stitch to sew the visor, regular straight stitch works fine. Also, make notches on the outer curve seam allowance. Turn the piece right side out and iron the seam flat.
Align the inner curve edges together and then stitch using a zig-zag stitch. Also, stitch around the outer curve of the visor, about 0.5 from the edge. To do so, you can use matching thread or different color for contrast.
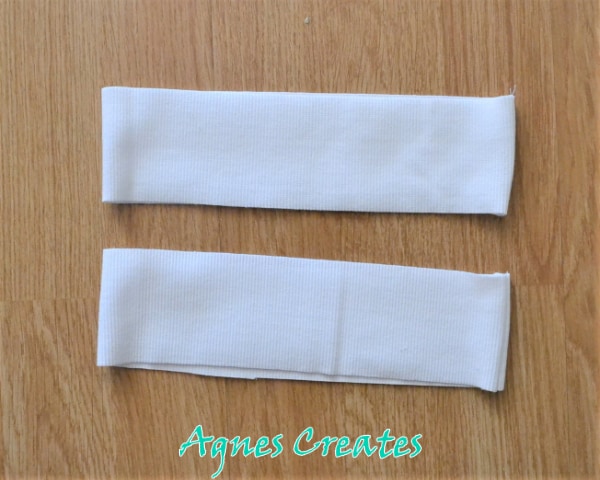
Step 2. Out of the ribbed fabric, cut two strips 19” long and 2.5” wide. Of course, cut the strips that the long edges are across the stretch of the fabric.
Pin the strips right side together and then stitch the short edges.
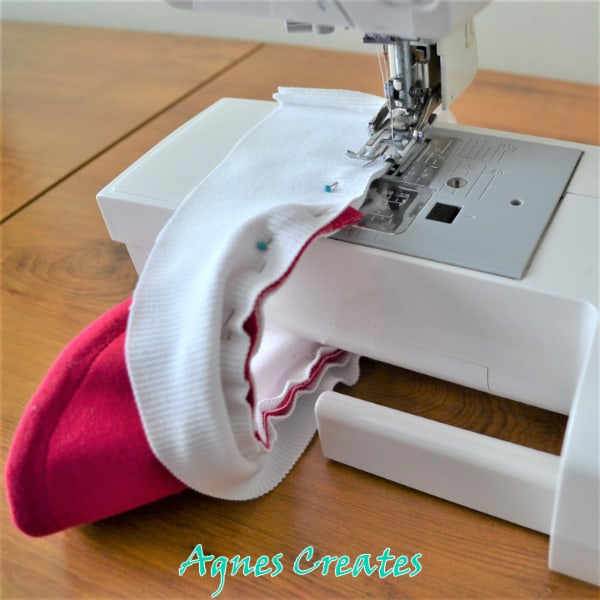
Step 3. Now, pin the strips right side toward the visor and make sure to align the edges. When pining the strips to the visor you can pull the fabric to stretch a tiny bit. It will make the strips and the visor edges align better.
After, you nicely aligned and pinned the pieces together, slowly stitch around. And, remember to use a stitch on your machine for knit fabrics.
Pin the opposite strips long edges together, and if you want, you can have just a band with a visor. You’ll need to stitch the edges together but using an overlock knit stitch.
Step 4. Now, to make the crown for the hat you need to cut out the printed pattern. And, then cut all the pieces out of the fabric but remember to add 3/8” seam allowance as it shows on the pattern.
So, to give your cap interesting and one of a kind looks, stitch all the pieces left side together.
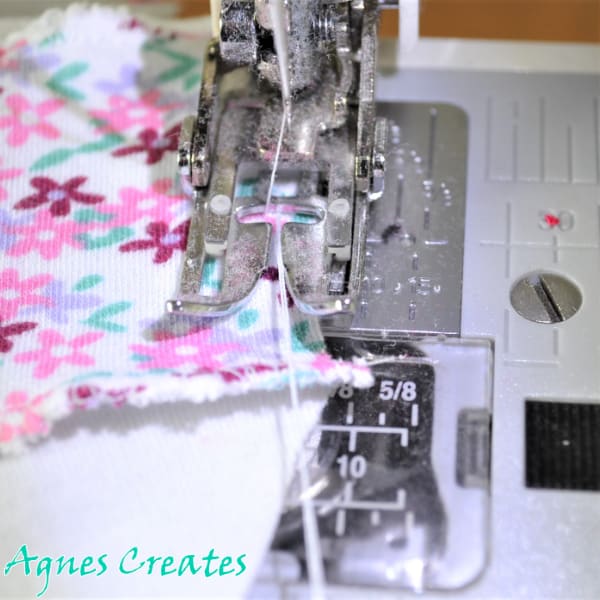
Now, in order to fit the crown piece to the ribbed band you need to gather the crown. And, that’s how I gather: pull the thread from the bobbin and the spool (a little longer than the length of the edges you want to gather). Then zig-zag along the edge, making sure both threads are in the middle of the zig-zag. Now, gather the edges by pulling the threads.
Gather the short edges of the middle pieces more than the round end pieces.
Mark center front and back on the ribbed band and also on the crown piece. Then, pin the left side of the crown to the inside band and stitch together using overlock knit stitch.
And, you are done sewing visor hat for hot and sunny days! If you would like to sew that hat in different sizes, you need to follow those two important tips:
make the ribbed band 1-1.5” smaller than your head circumference
for the crown circle diameter is the measurement from one ear and over the top of your head to another ear.
Easy to Sew Visor Hat Pattern – Free Printable
Get the password for the library with the free pattern here by filling out this form:
I hope you enjoyed sewing the visor hat and you are welcome to share a picture of your work on my Facebook page. Also, check my post on how to sew bandana visor hat for your girly girl and Masha and the Bear lover!